> ## Documentation Index
> Fetch the complete documentation index at: https://docs.levelblue.com/llms.txt
> Use this file to discover all available pages before exploring further.
# Redeploying an AWS Sensor using the same IP
> Instructions on Redeploying the AWS sensor while Retraining same IP
Follow these steps to redeploy your AWS USM Anywhere Sensor while conserving the same IP address:
[**Backup Current Configurations:**](https://docs.levelblue.com/documentation/usm-anywhere/user-guide/sensor-management/sensor-backups) Document your log sources, feeds, and integrations. Follow the step-by-step instructions to back up the sensor configuration.
**1. Delete the Sensor VM to Free the IP**
* In the AWS Console, delete the existing Sensor instance.
* This frees the private IP so that it can be reassigned through the Elastic IP configuration when you deploy the replacement sensor.
**2. Download the AWS Sensor Template**
* Go to the USM Anywhere Sensor Downloads page
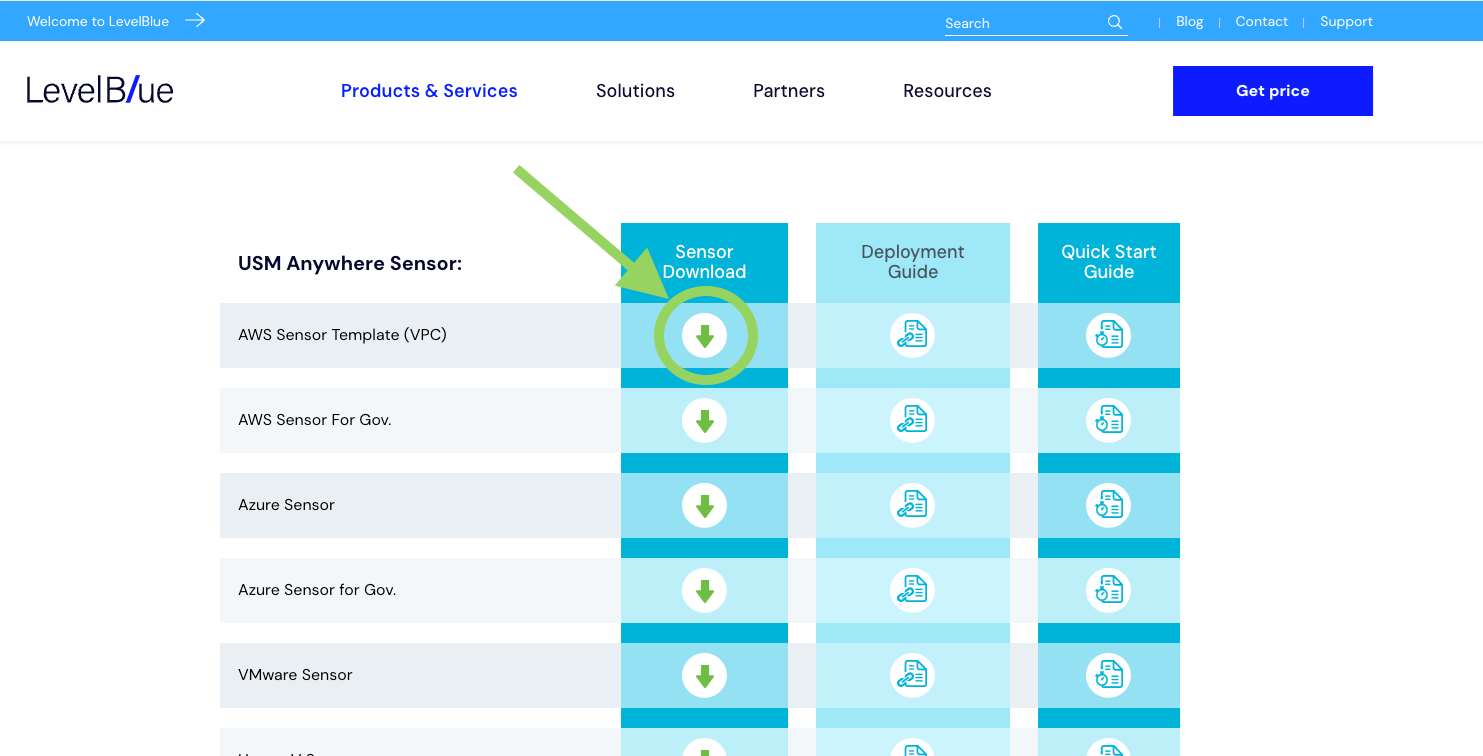 * Locate the AWS VPC Sensor CloudFormation template and download it.
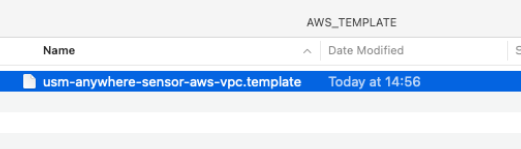
 * Save the template file locally for editing.
 **2. Edit the CloudFormation Template**
* Open the downloaded template in a text editor.
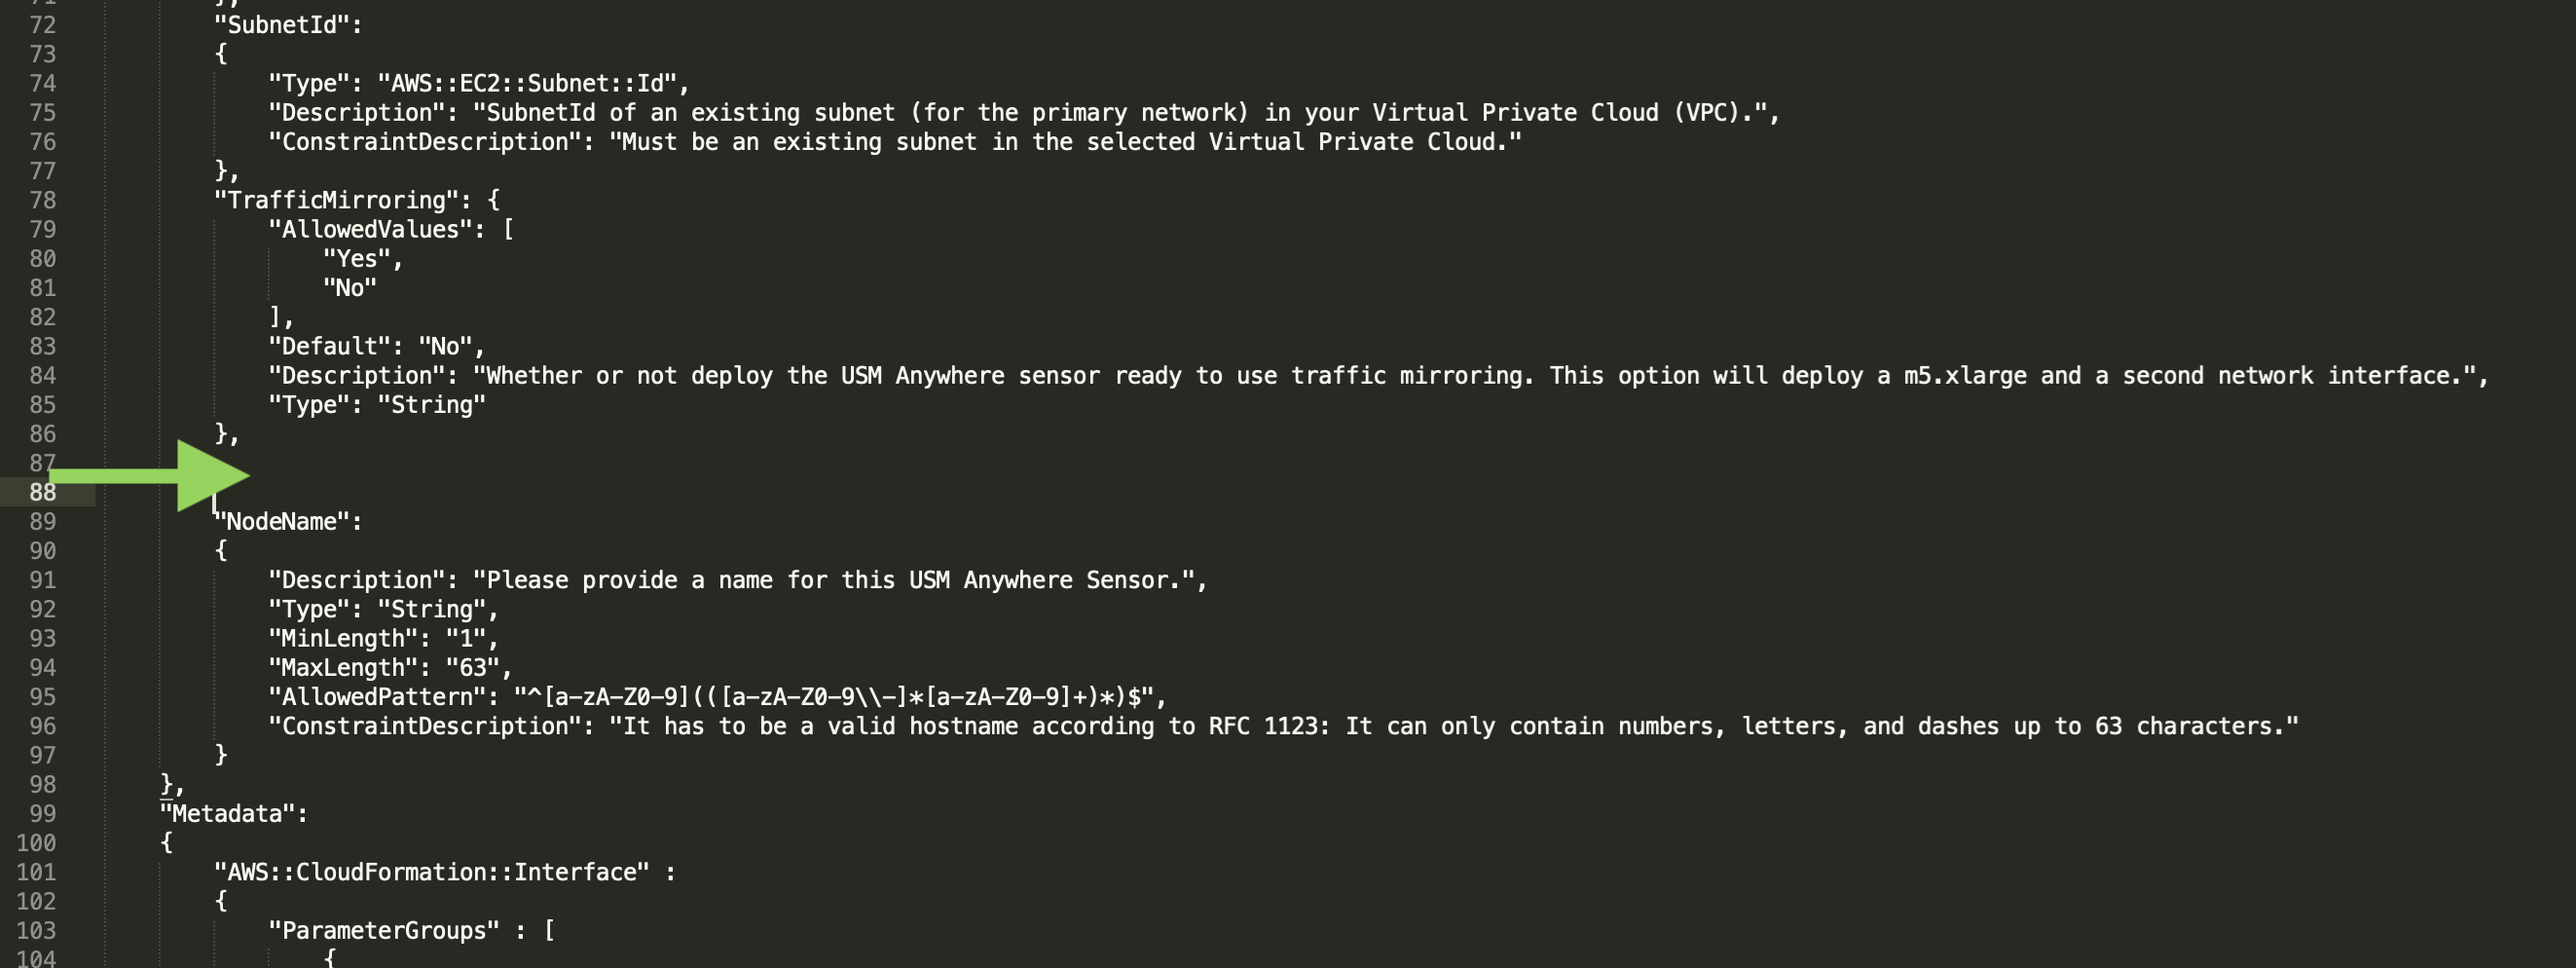
* Insert the following section after the “TrafficMirroring” block to define the Primary IP parameter:
```
“PrimaryIP”:
{
"Type": "AWS::EC2::EIP",
"Description": "Primary IP",
"Type": "String"
},
```
**2. Edit the CloudFormation Template**
* Open the downloaded template in a text editor.
* Insert the following section after the “TrafficMirroring” block to define the Primary IP parameter:
```
“PrimaryIP”:
{
"Type": "AWS::EC2::EIP",
"Description": "Primary IP",
"Type": "String"
},
```
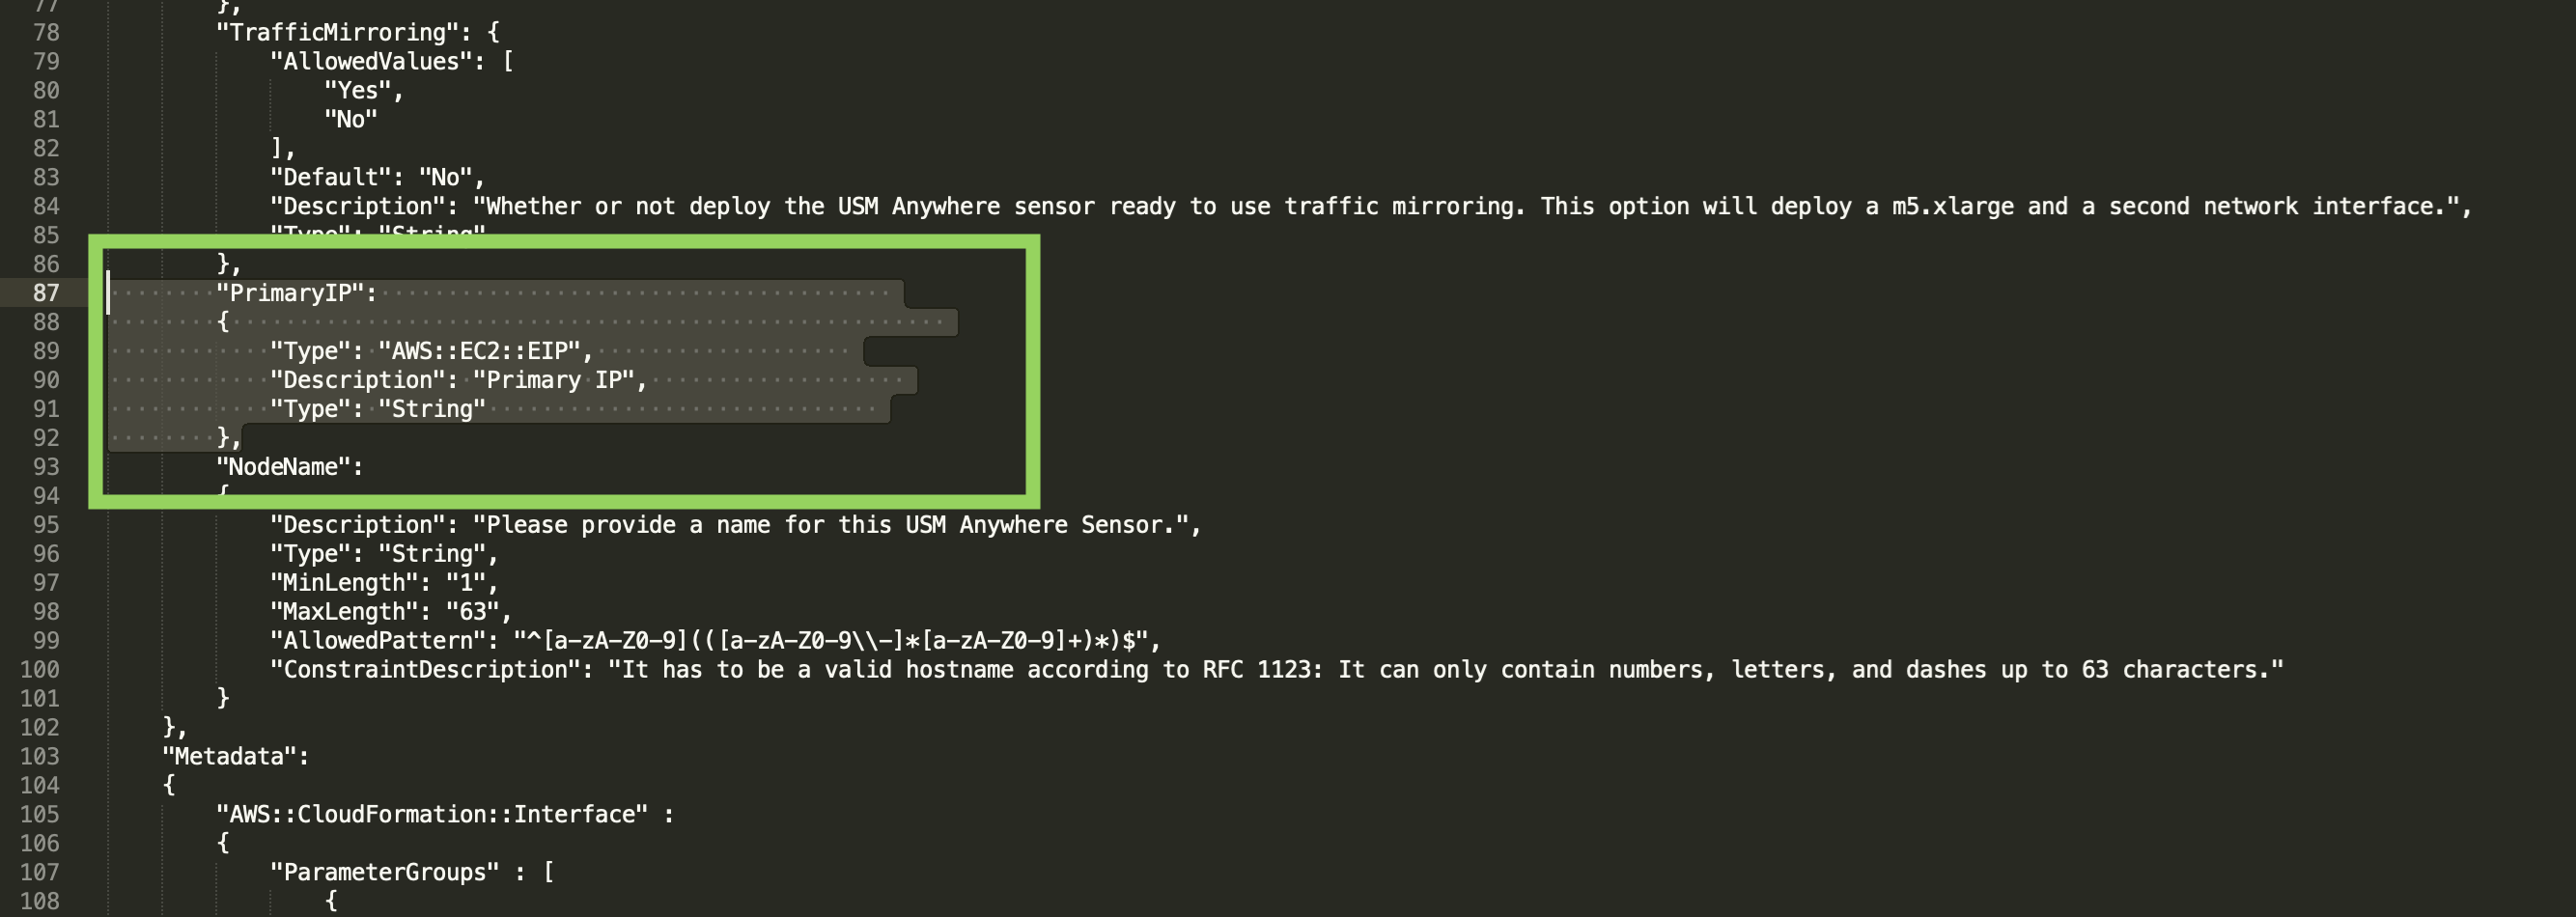
 * It should look like the following:
 * In the NetworkInterfaces section of the template, update the Subnet configuration to include the Primary IP reference:
```
"SubnetId": { "Ref" : "SubnetId" },
"PrivateIpAddress": { "Ref" : "PrimaryIP" }
```
* In the NetworkInterfaces section of the template, update the Subnet configuration to include the Primary IP reference:
```
"SubnetId": { "Ref" : "SubnetId" },
"PrivateIpAddress": { "Ref" : "PrimaryIP" }
```
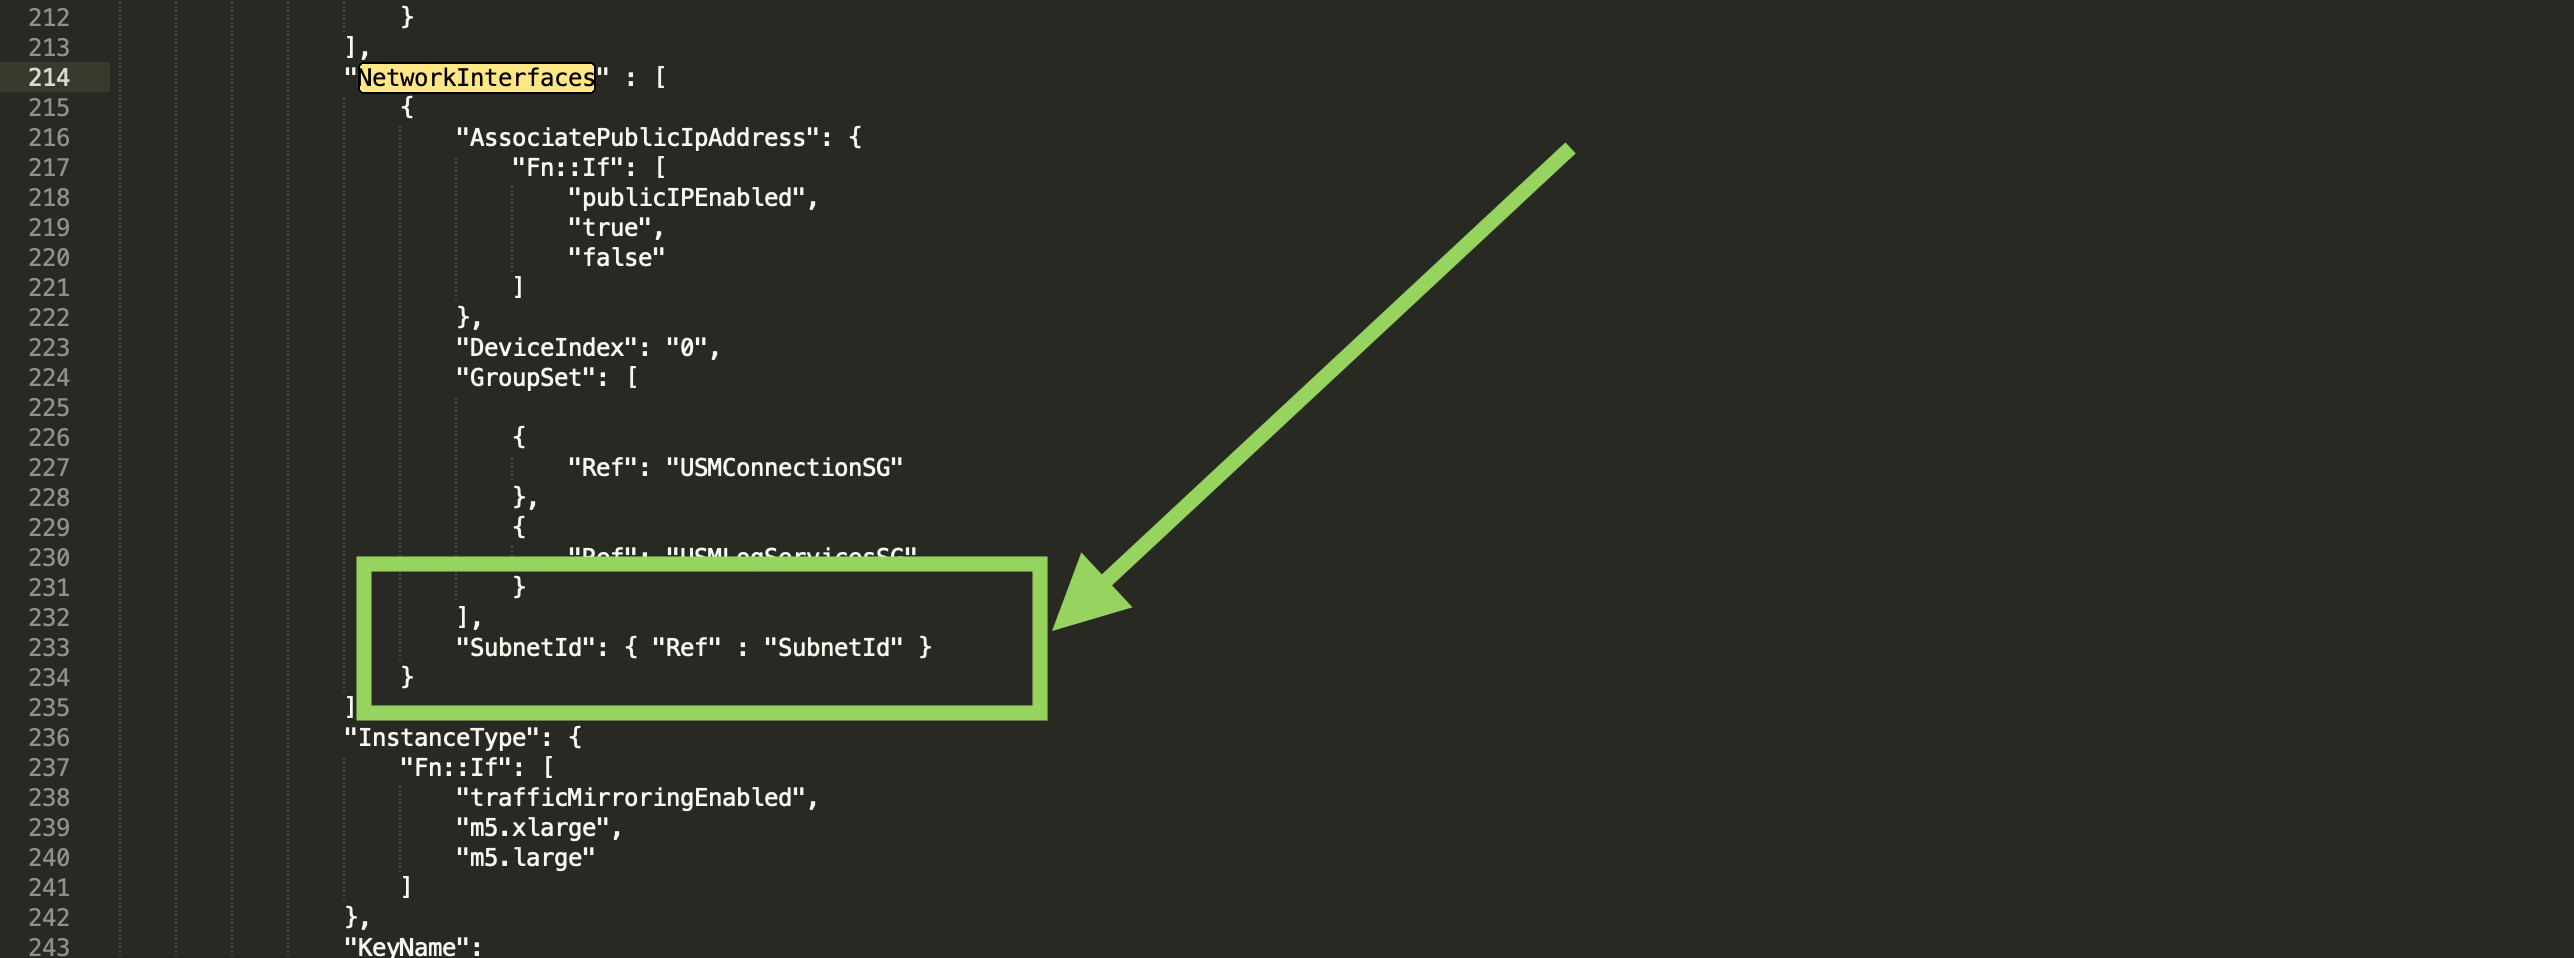 * It will look like this:
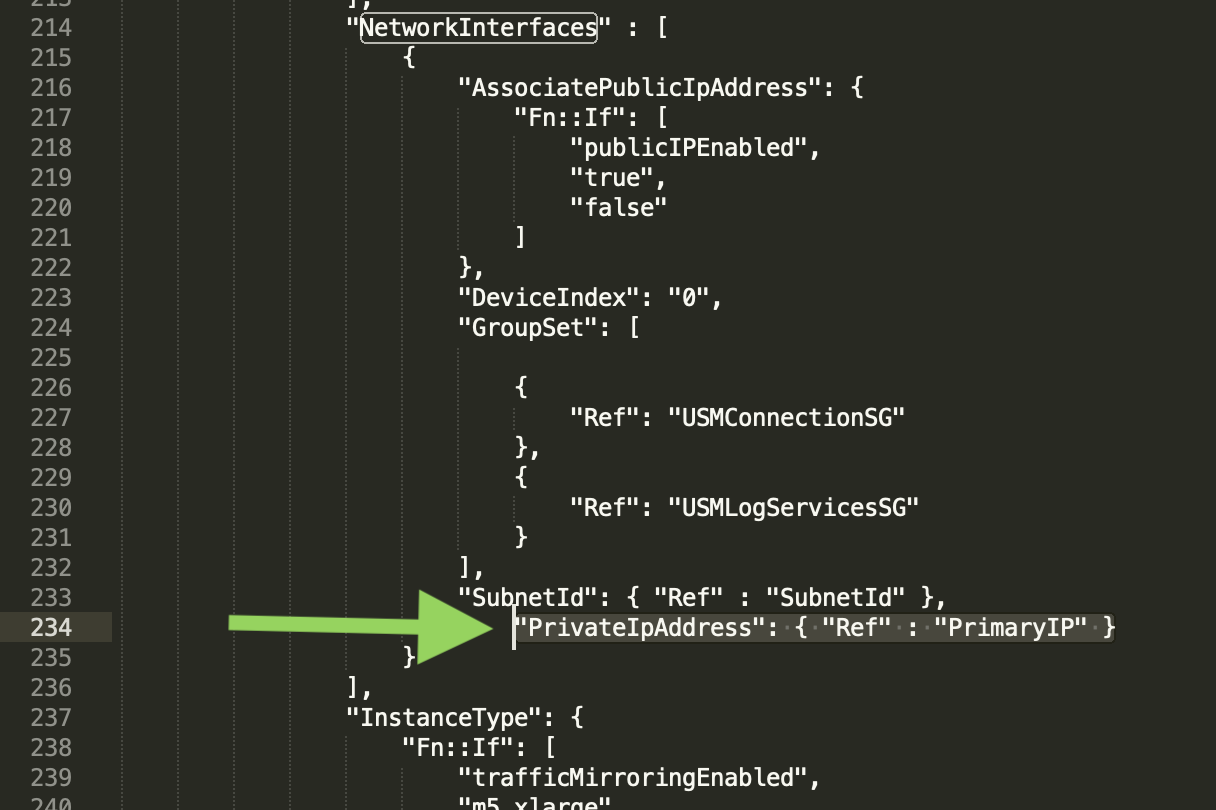 * Save your changes to the modified template file.
**3. Redeploying the Sensor with AWS CloudFormation**
* Log in to the AWS Management Console.
* Navigate to CloudFormation and select Create stack → With new resources (standard).
* Choose Upload a template file, then select the modified template you saved earlier.
* Save your changes to the modified template file.
**3. Redeploying the Sensor with AWS CloudFormation**
* Log in to the AWS Management Console.
* Navigate to CloudFormation and select Create stack → With new resources (standard).
* Choose Upload a template file, then select the modified template you saved earlier.
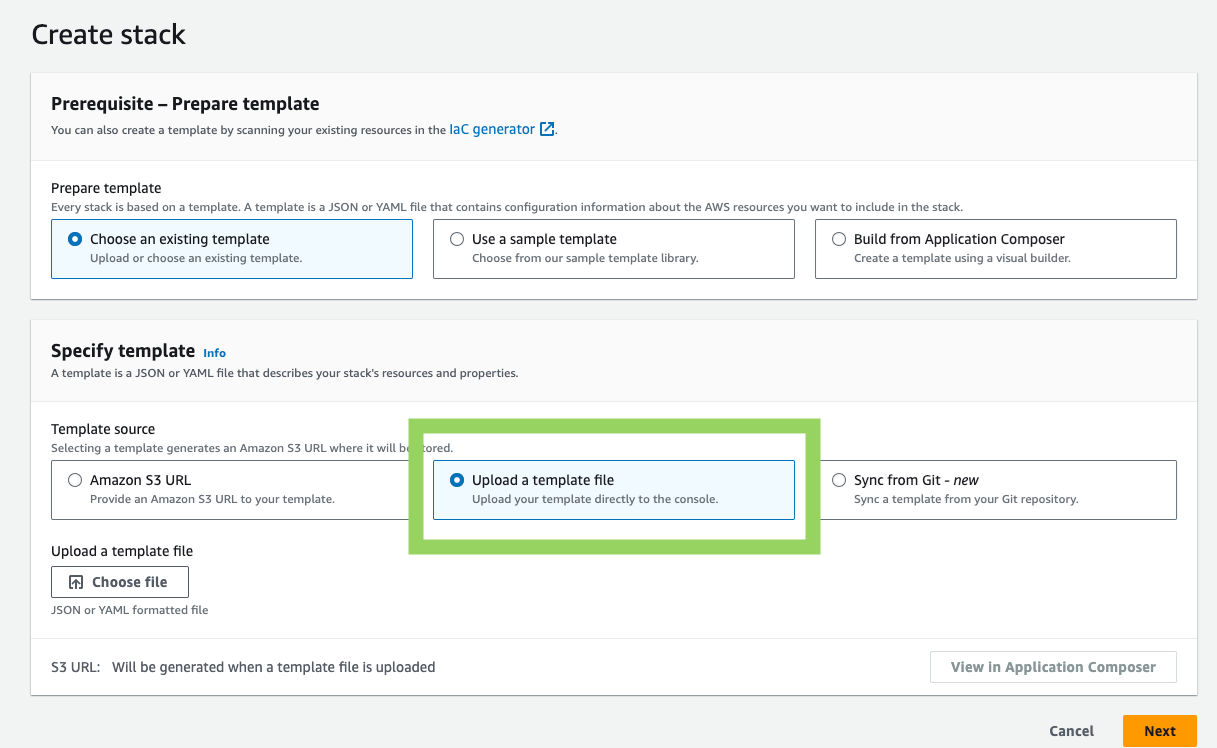 * Continue through the stack creation wizard.
* When prompted, enter the previous Sensor IP address in the Primary IP field.
* Continue through the stack creation wizard.
* When prompted, enter the previous Sensor IP address in the Primary IP field.
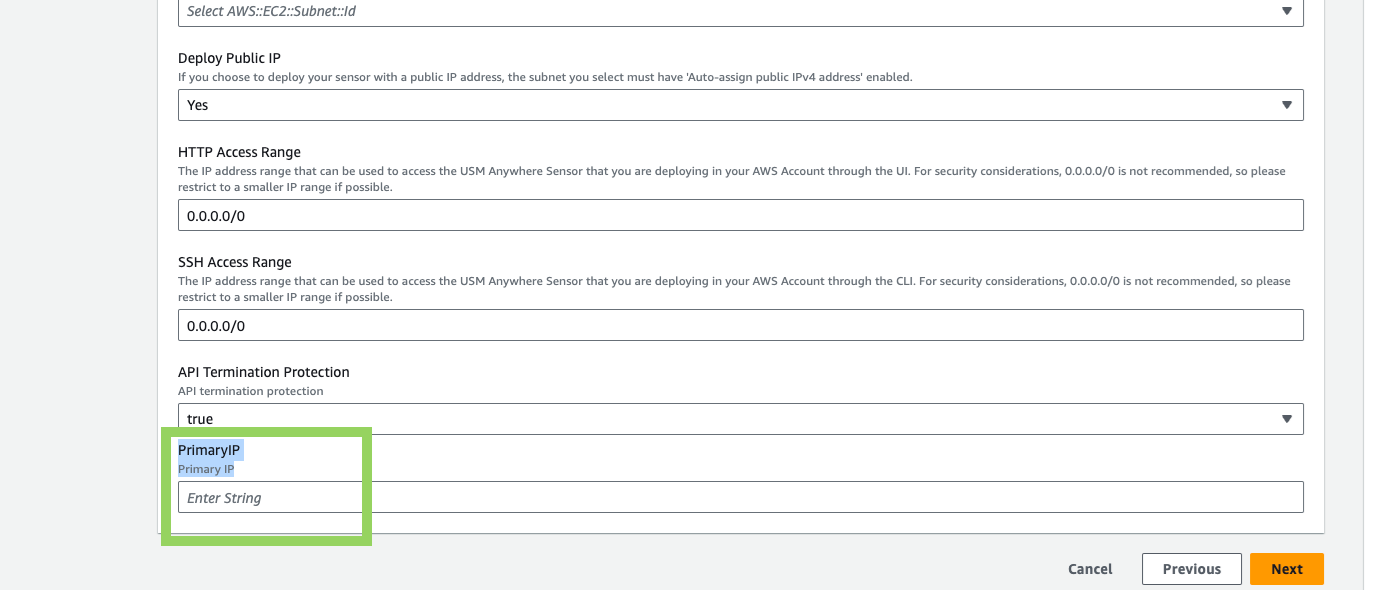 **4. Complete the Redeployment**
* Proceed with the CloudFormation stack deployment as normal
* Once the stack finishes, the new AWS Sensor will be deployed with the same IP as the previous sensor.
**Restore Sensor Backup**
1. Open your virtualization management console and connect to the USM Anywhere Sensor virtual machine (VM).
**Important:** Alternatively, you can open an SSH session to the sensor VM. When using an SSH session, the default username is *sysadmin*.
If you are accessing a USM Sensor through SSH and you specified a username other than the default (*sysadmin*) for your SSH access, you must use the following commands at the command line to "sudo up" and access the sensor console:
```
# sudo su – sysadmin
```
2. From the USM Anywhere Sensor console System Menu, select **Maintenance** and press **Enter**.
**4. Complete the Redeployment**
* Proceed with the CloudFormation stack deployment as normal
* Once the stack finishes, the new AWS Sensor will be deployed with the same IP as the previous sensor.
**Restore Sensor Backup**
1. Open your virtualization management console and connect to the USM Anywhere Sensor virtual machine (VM).
**Important:** Alternatively, you can open an SSH session to the sensor VM. When using an SSH session, the default username is *sysadmin*.
If you are accessing a USM Sensor through SSH and you specified a username other than the default (*sysadmin*) for your SSH access, you must use the following commands at the command line to "sudo up" and access the sensor console:
```
# sudo su – sysadmin
```
2. From the USM Anywhere Sensor console System Menu, select **Maintenance** and press **Enter**.
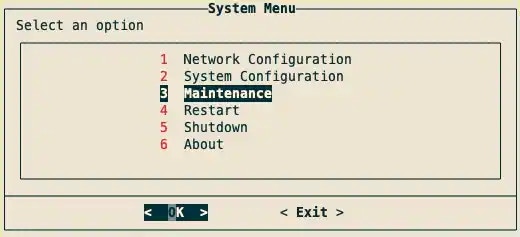 3. From the Maintenance menu, select **Restore Backup** and press **Enter**.
 4. Enter the FQDN and press **Enter**
5. Enter BackupID and press \*\*Enter. \*\*A progress bar will appear. Once it has completed, a dialog box confirming changes have been applied will appear.
4. Enter the FQDN and press **Enter**
5. Enter BackupID and press \*\*Enter. \*\*A progress bar will appear. Once it has completed, a dialog box confirming changes have been applied will appear.
 6. Press \*\*Enter. \*\*Your sensor will now be restored.