

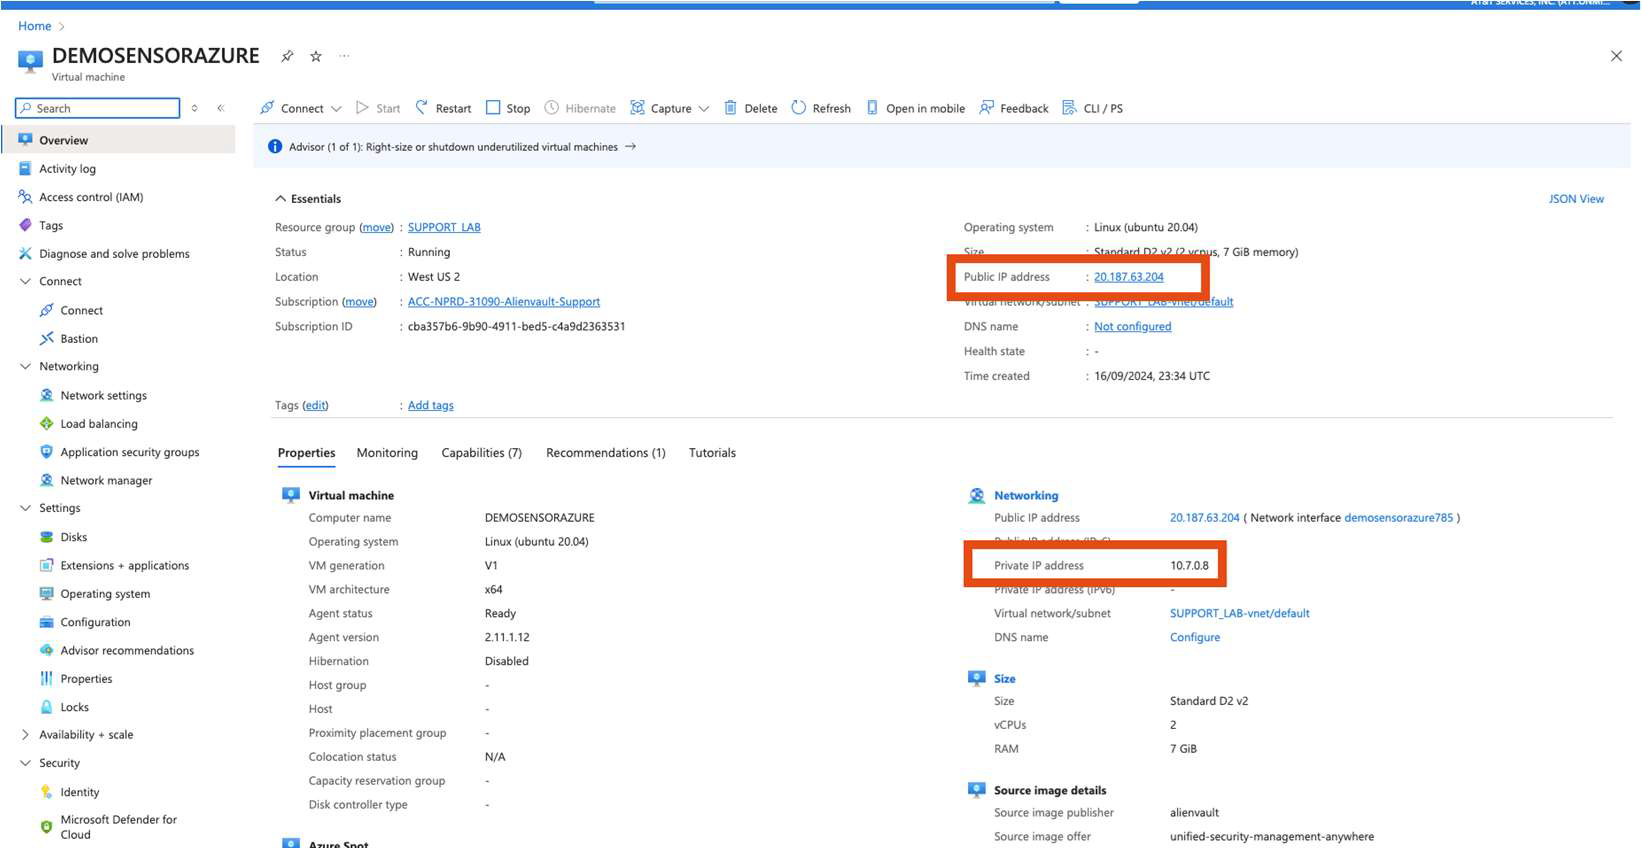
Use this procedure to redeploy your USM Anywhere Sensor in Microsoft Azure while retaining the same public and private IP addresses.
This process ensures that your existing integrations and data sources continue working without requiring IP changes.
Step 1. Identify the Sensor in the USM Anywhere UI
- Log in to the USM Anywhere console.
- Go to Data Sources > Sensors.
-
Identify the sensor you want to redeploy.

- Record its public and private IP addresses for later use.
Step 2. Gather Backup Information from the Sensor CLI
- Connect to the sensor console using SSH or Azure Serial Console.
-
From the Maintenance menu, select Get Backup Information and press Enter.
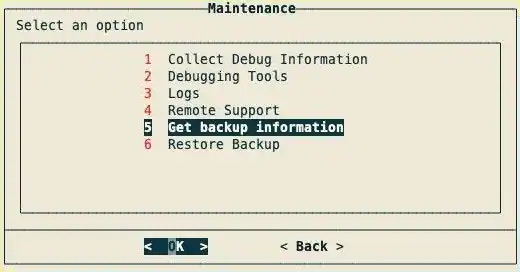
-
Copy the FQDN and BackupID, and save them for later use.
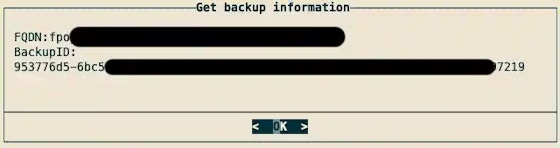
Step 3. Delete the Existing Sensor VM While Preserve Networking Resources
-
In the Azure Portal, open the existing sensor Virtual Machine.
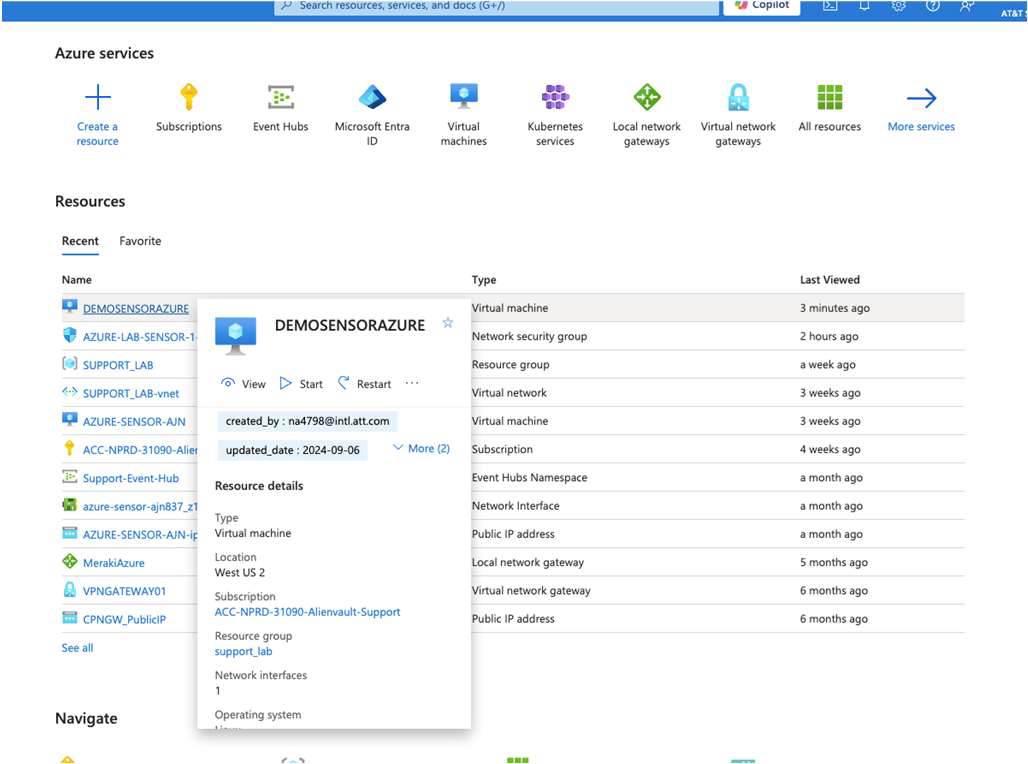
-
Note the following configuration details:
- Resource group
- Virtual network/Subnet
- Network Security Group (NSG)
- Network Interface (NIC)
- Public IP Address
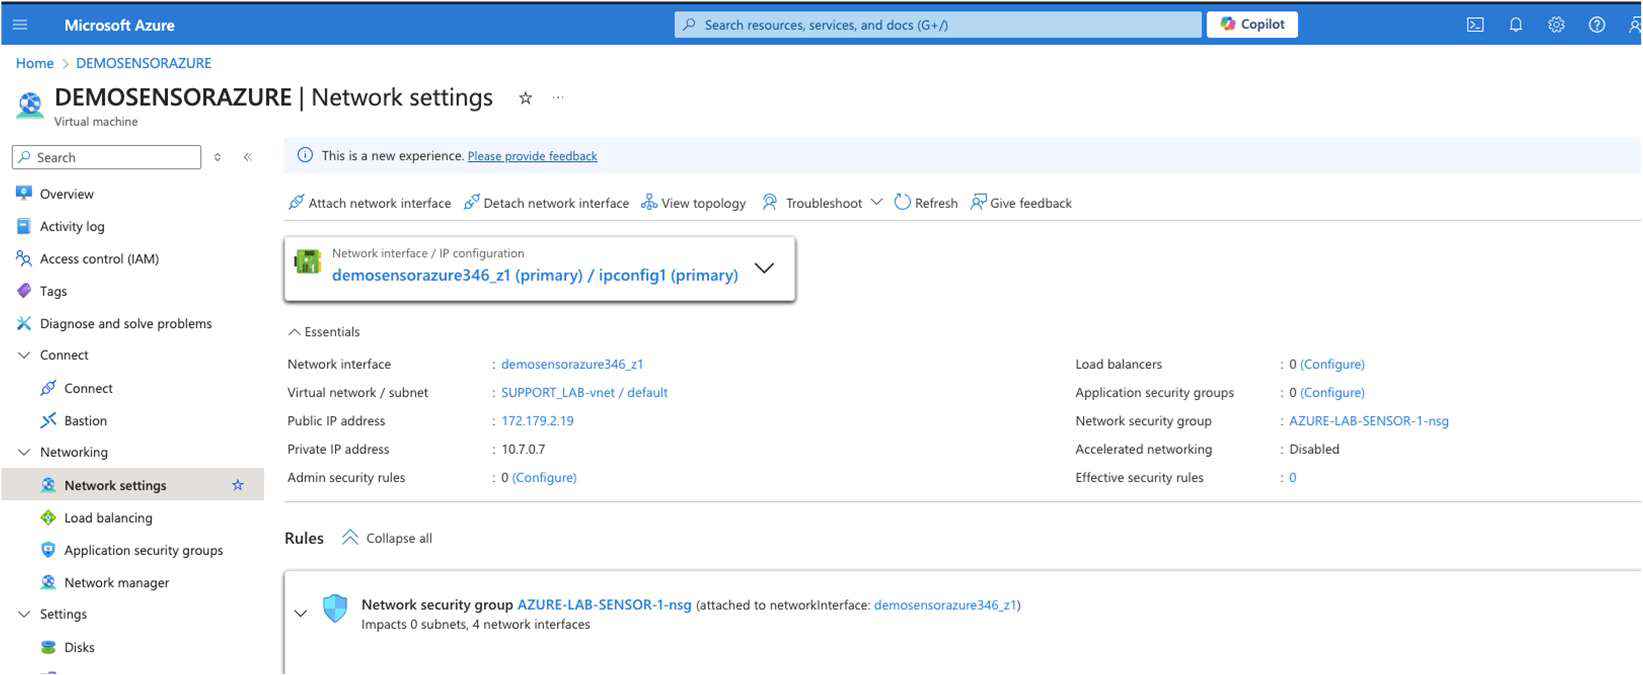
-
Delete the VM and its OS/Data disks, but do not delete:
- The Network Interface (NIC)
- The Public IP Address resource
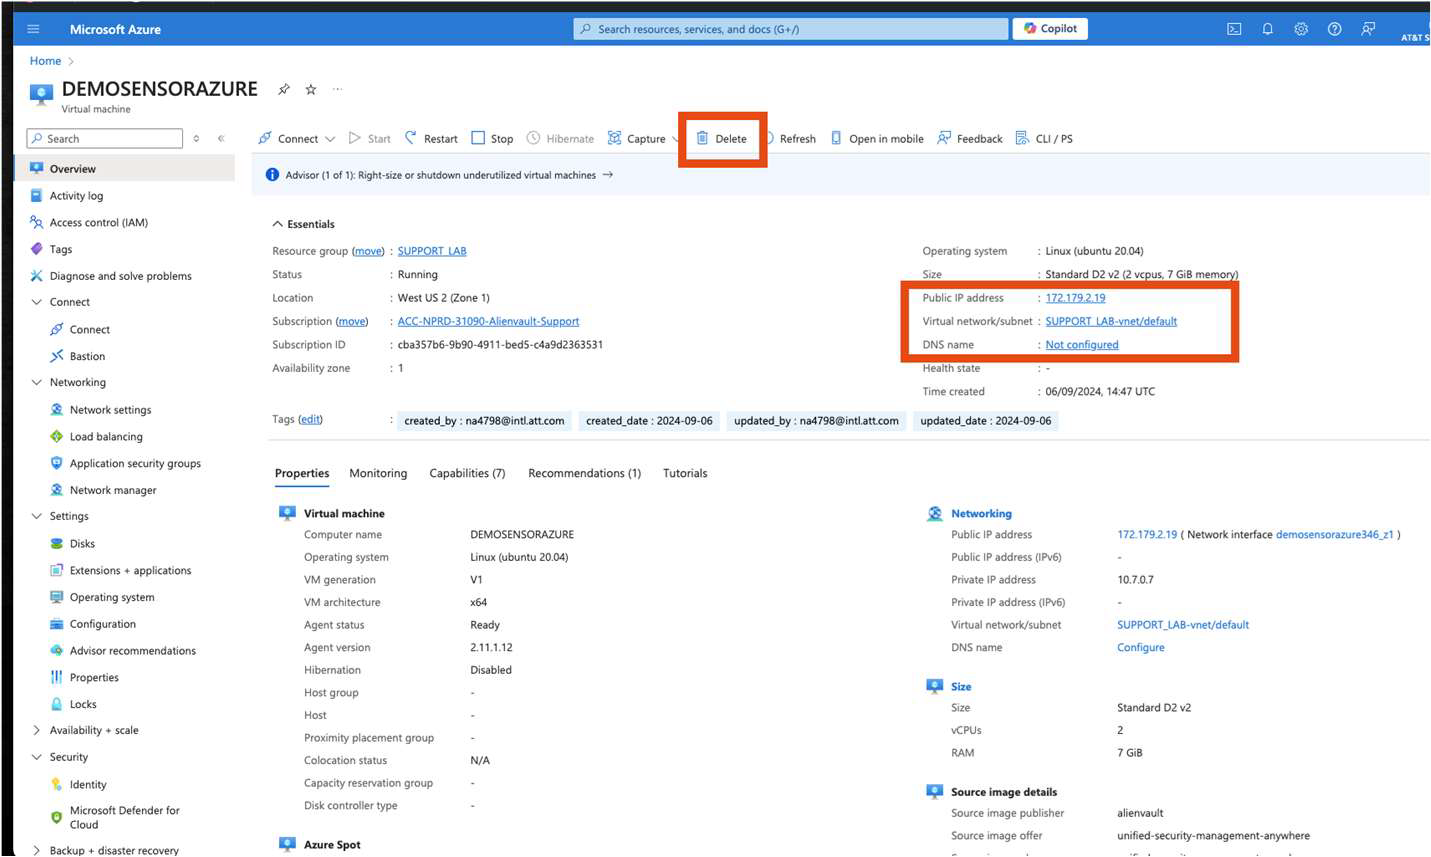
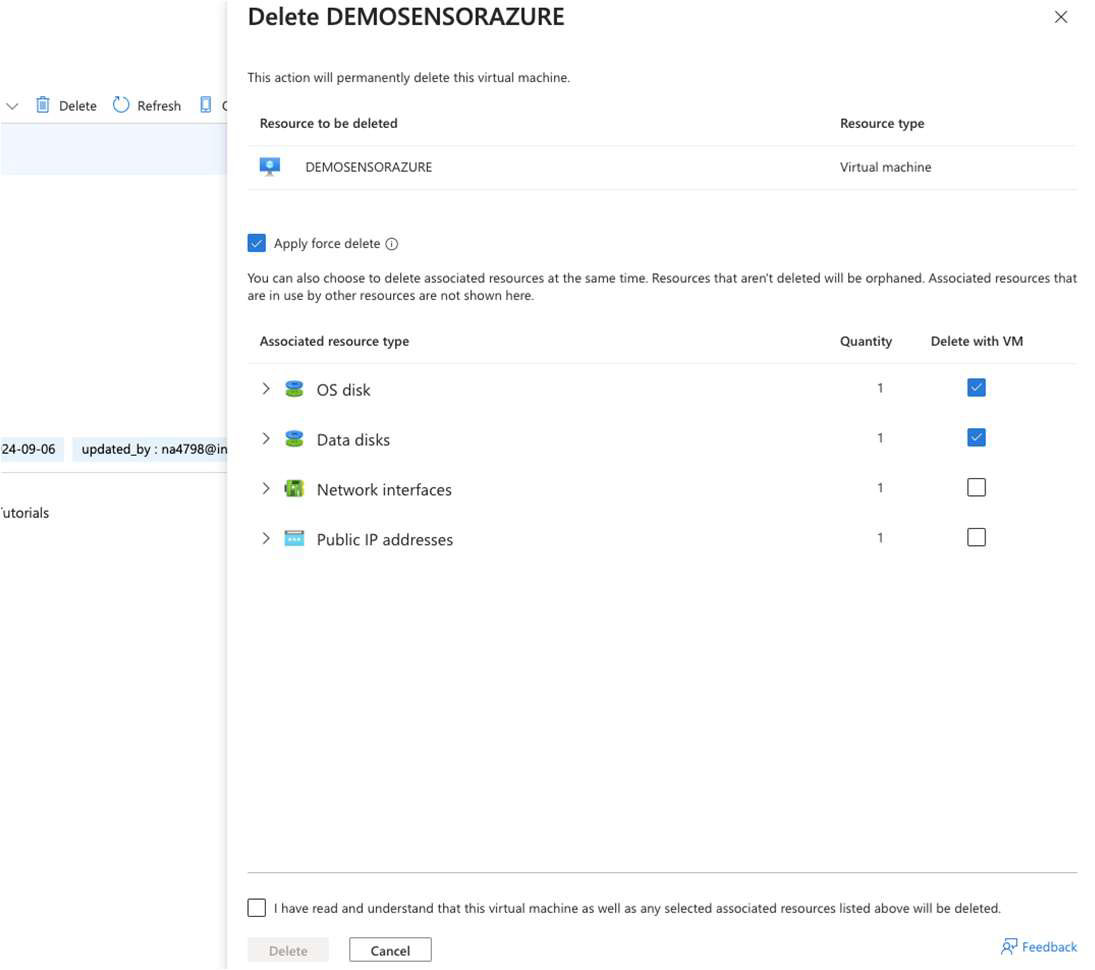
At this point, the sensor will appear as Connection Lost in the USM Anywhere UI. This is expected behavior.

Step 4. Deploy a New Azure Sensor VM
-
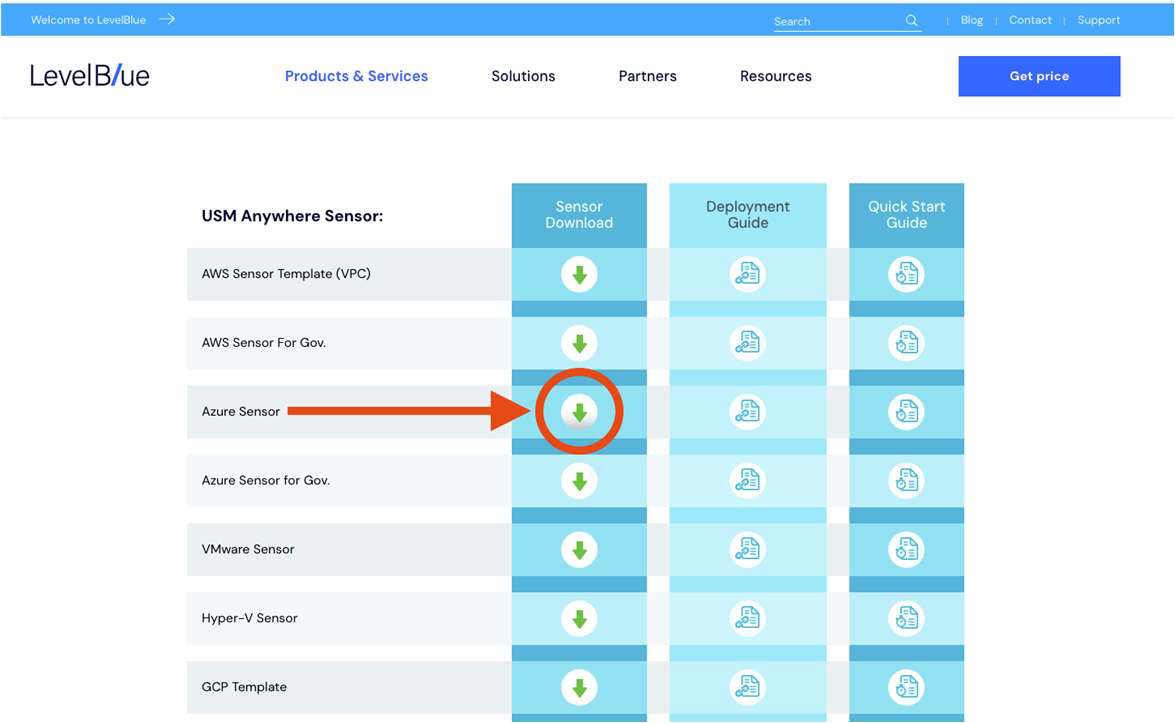
Go to the USM Anywhere Sensor Downloads page and select the download link of the Azure Sensor.
-
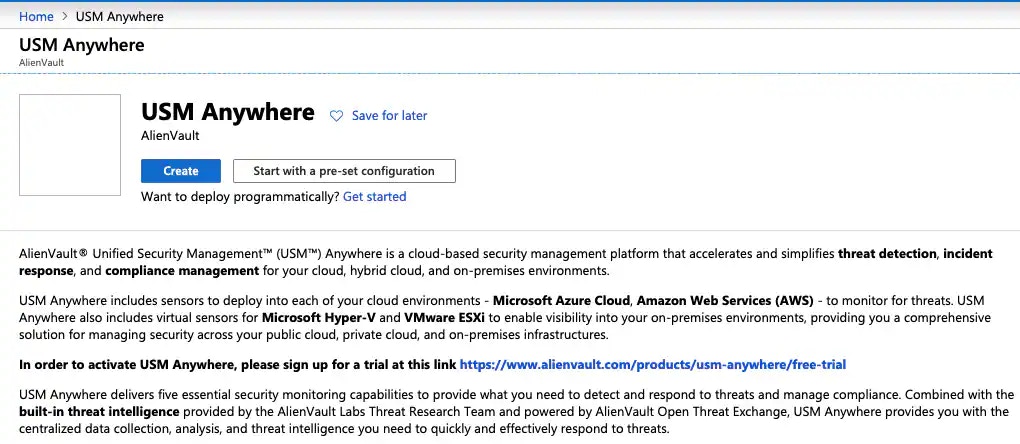
On the page, review the details of the license and click Create.
This takes you to the Create a virtual machine page, which guides you through the steps for deploying the USM Anywhere Sensor VM.
-
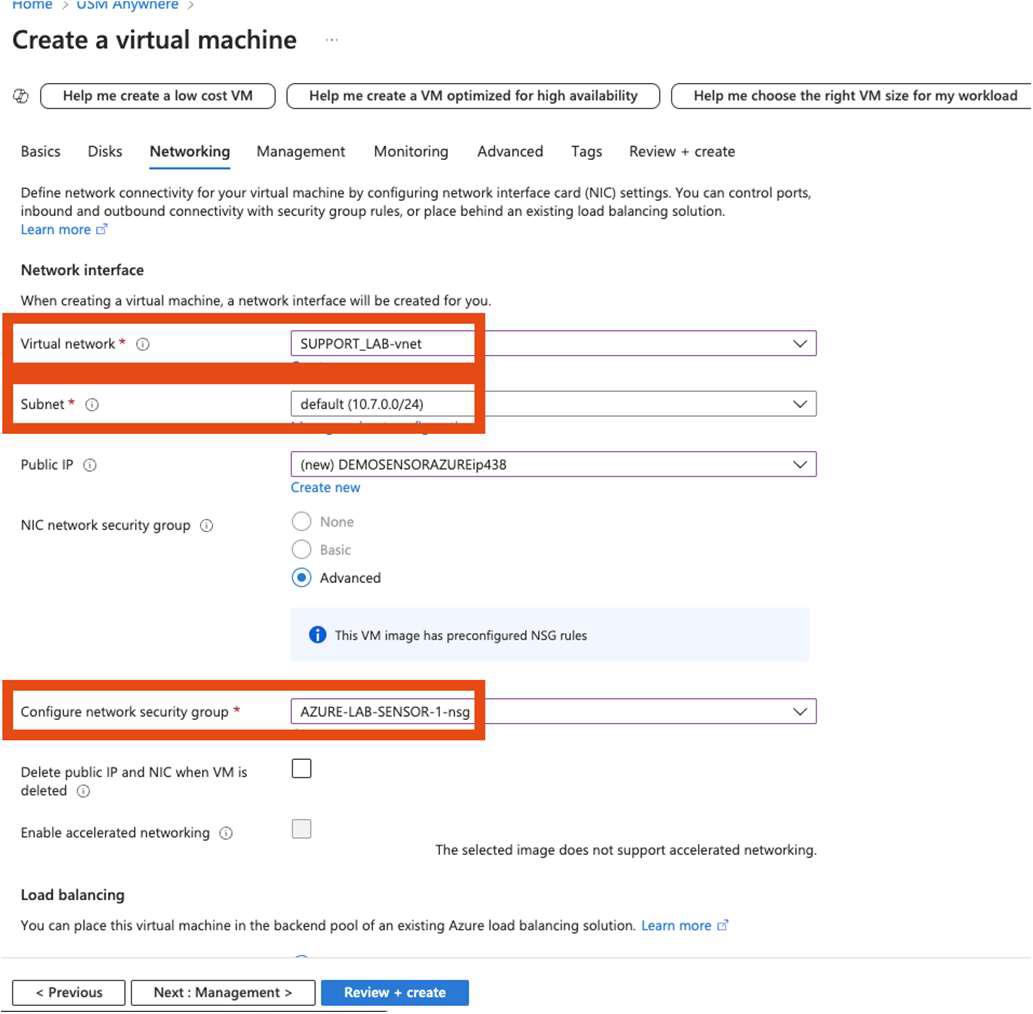
During configuration:
- Assign the same Virtual Network and Subnet as the original sensor.
- Reuse the same Security Group settings.
-
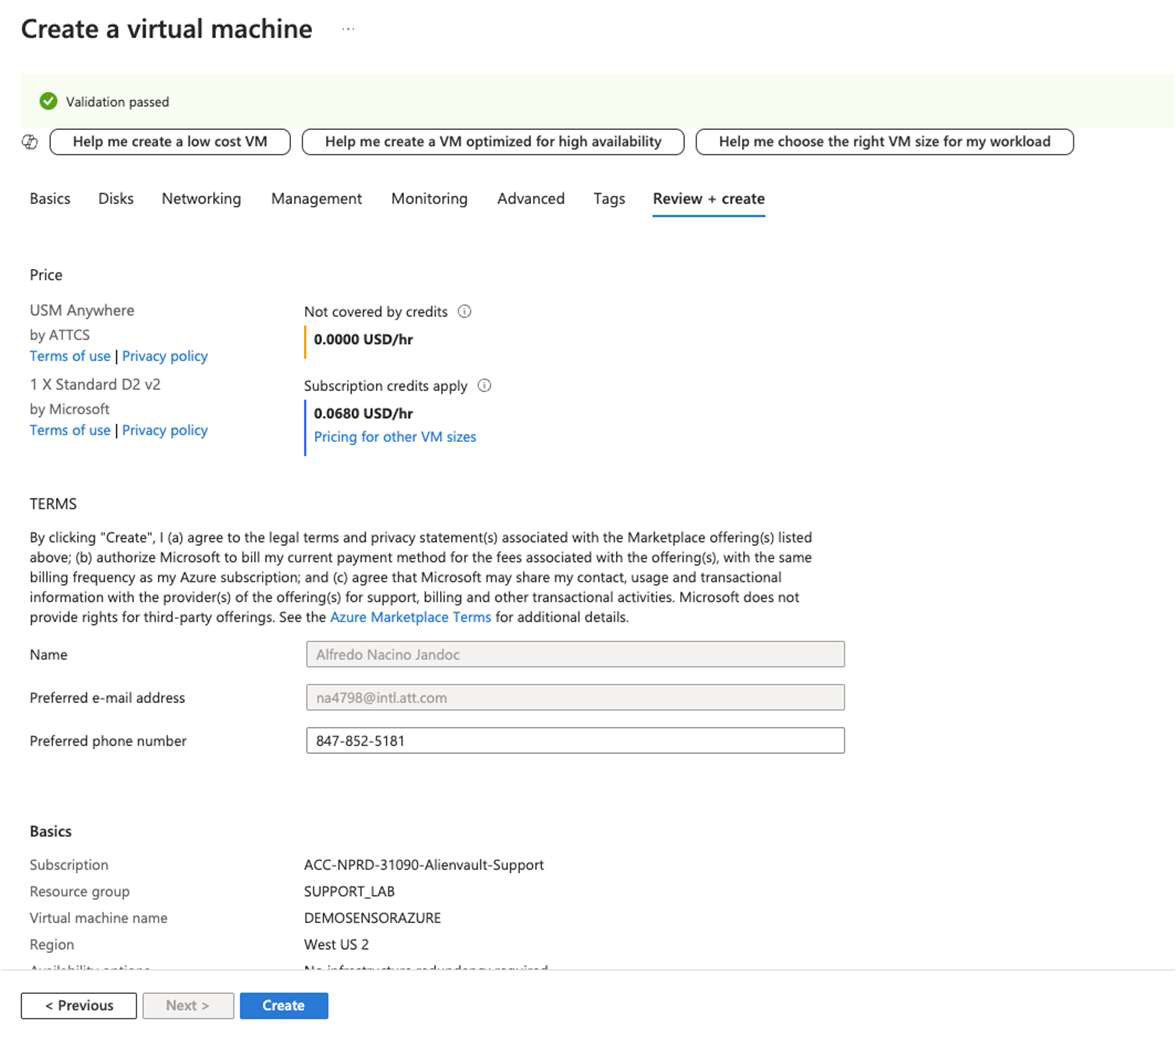
Complete the creation by selecting Create.
Step 5. Stop the New Sensor VM and Swap the Network Interface
-
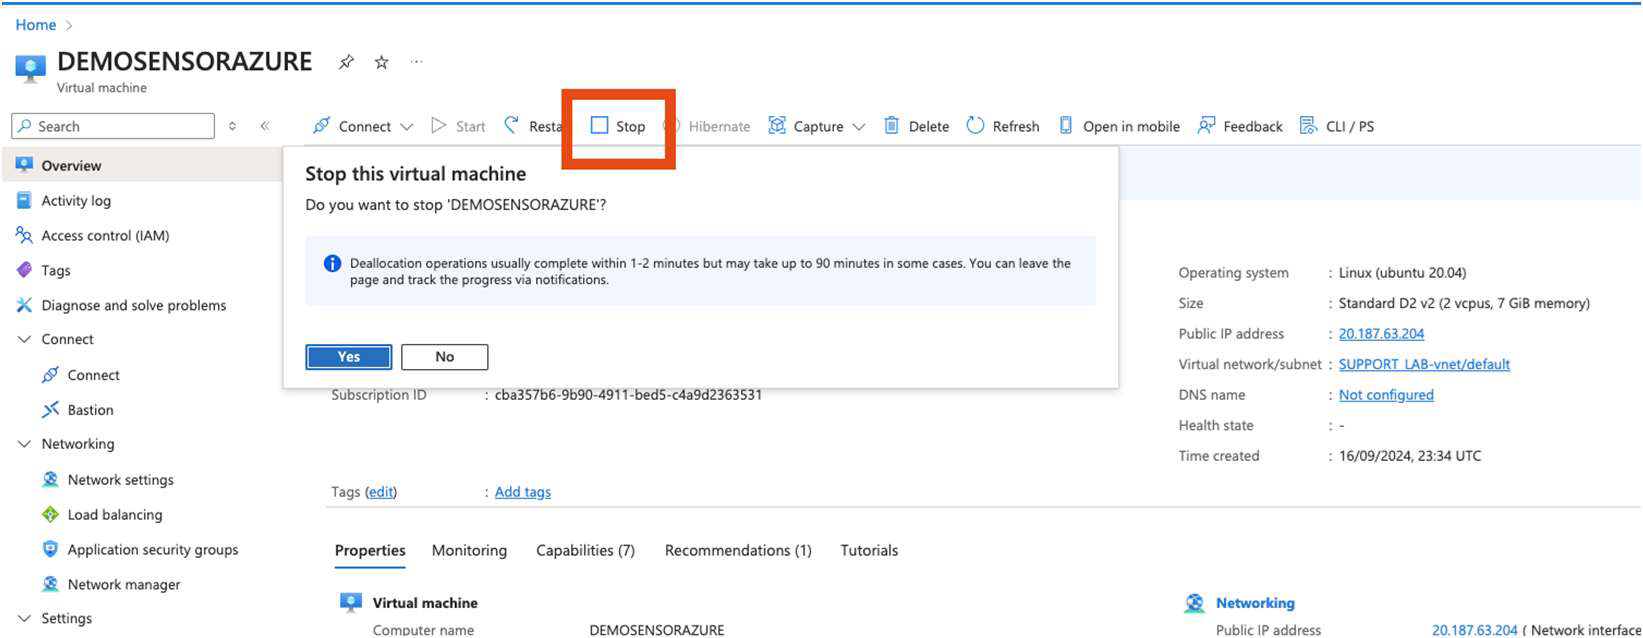
In the Azure Portal, go to the new sensor VM and select Stop to deallocate it.
-
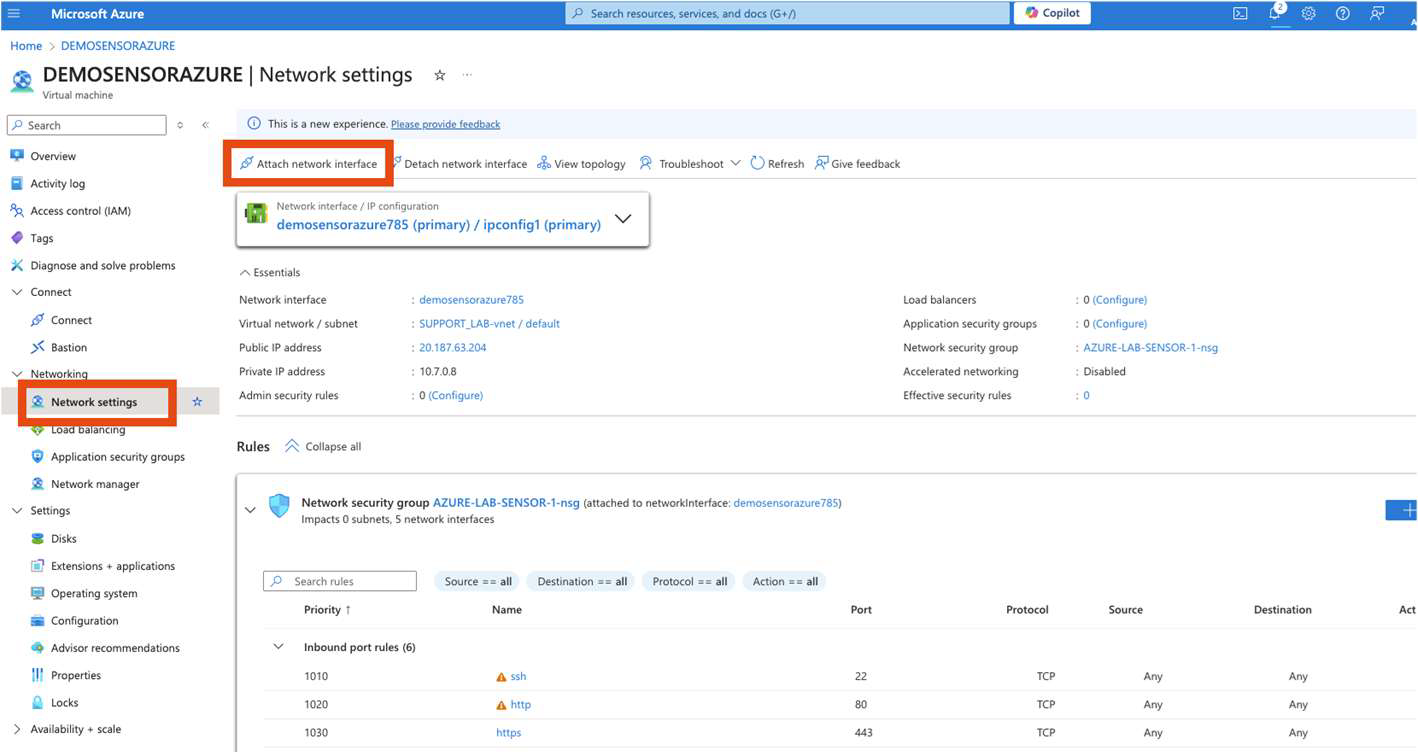
From the resource list, select the original NIC that retains the old IP address.
-
Attach this preserved NIC to the new VM as Primary.
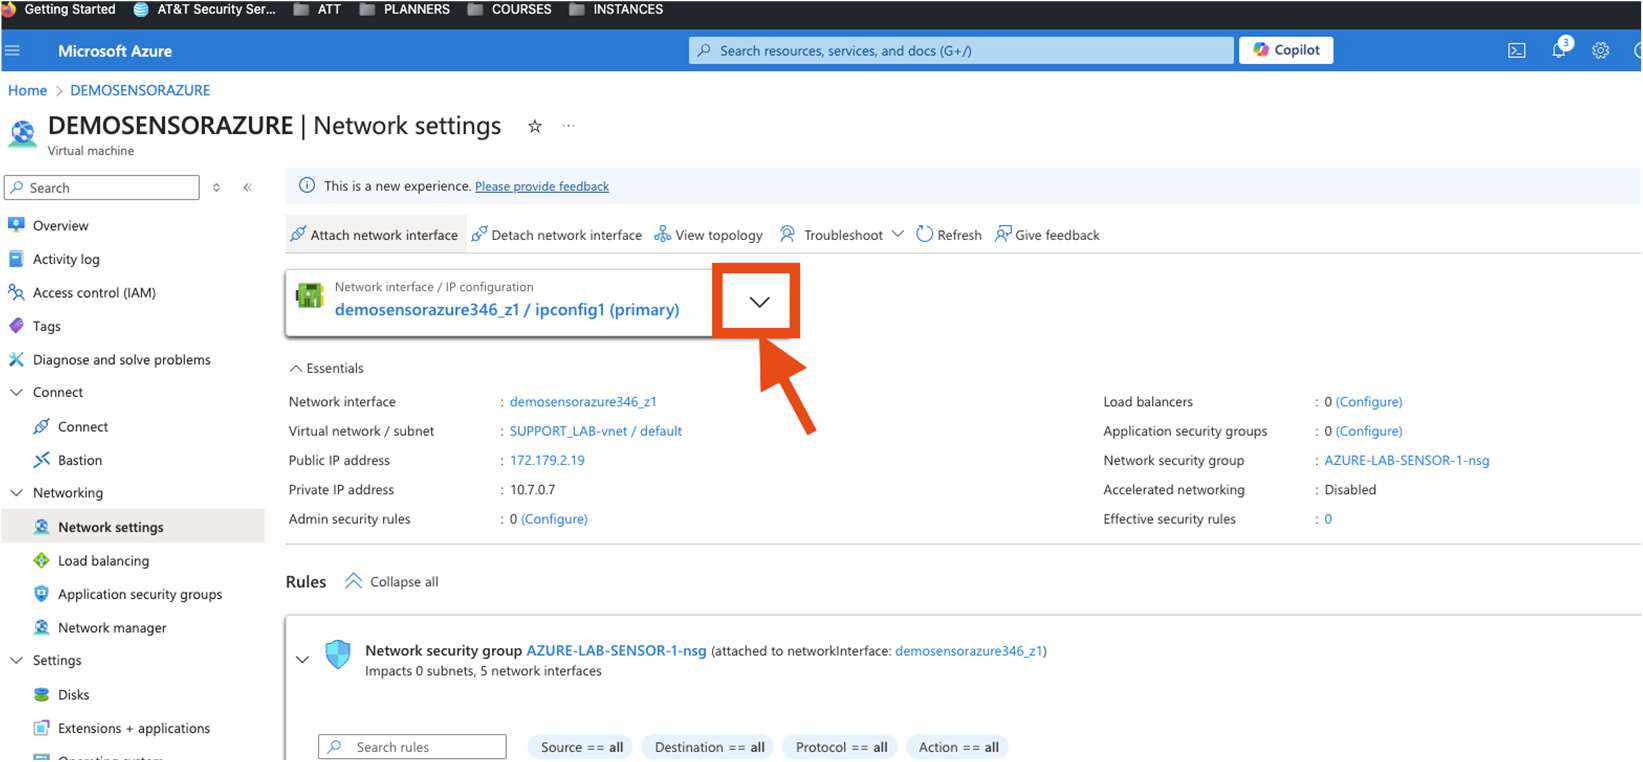
- Open the Networking blade for the new VM and detach its temporary NIC.
- Start the VM again.
If the VM fails to start due to NIC conflicts, ensure the old NIC is detached from any previous VM and retry.
Step 6. Restore Sensor Backup
- Open your virtualization management console and connect to the USM Anywhere Sensor virtual machine (VM).
-
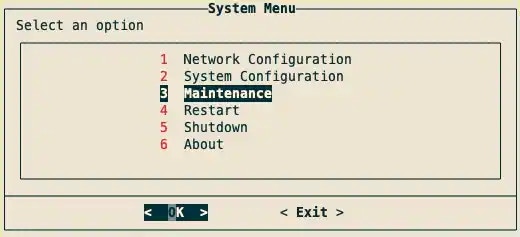
From the USM Anywhere Sensor console System Menu, select Maintenance and press Enter.
-
From the Maintenance menu, select Restore Backup and press Enter.

- Enter the FQDN and press Enter
-
Enter BackupID and press Enter. A progress bar will appear. Once it has completed, a dialog box confirming changes have been applied will appear.

- Press Enter. Your sensor will now be restored.
Step 7. Verify Connectivity and Log Ingestion
- In USM Anywhere, confirm the redeployed sensor shows Connected status.
- Check that events and alarms are appearing normally.
- Verify that the sensor is forwarding logs and communicating with BlueApps and integrations as expected.