- Go to the USM Anywhere Sensor Downloads page and click the icon of your specific sensor. After clicking, your browser starts to download the USM Anywhere Sensor package. Depending on your Internet connection, the download can take 30 minutes or more.
- Extract the USM Anywhere Sensor package and place the files where they are accessible from your Hyper-V management tool.
Create the VM with SCVMM 2012
Follow these procedures to create and start the VM using SCVMM 2012.Creating the VM
Creating the VM
To create a VM with SCVMM 2012
- Connect to the SCVMM 2012.
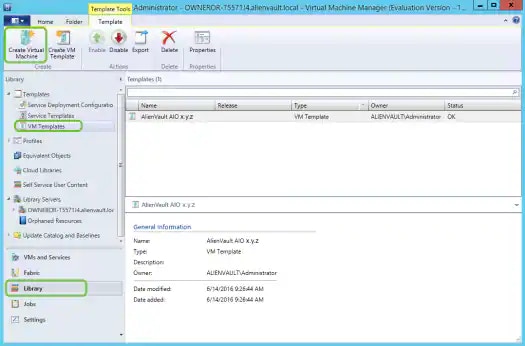
- Select Library > VM Templates.
-
Select the LevelBlue VM template under VM Templates, and then click Create Virtual Machine.
- Enter a name for the VM, and then click Next.
- In Configure Hardware, click Next.
- In Select Destination, choose whether to deploy or store the VM, and then click Next.
- In Select Host, select a destination for the VM, and then click Next.
- In Configure Settings, review the VM settings, and then click Next.
- In Add Properties, change the automatic actions if necessary, and then click Next.
-
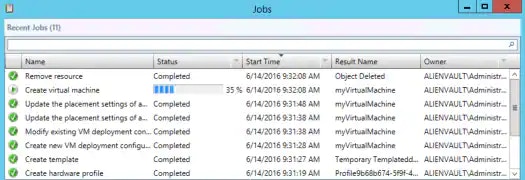
In Summary, confirm the settings and then click Next.
The Jobs window opens and shows the VM being created.
Starting the VM
Starting the VM
To start the VM and connect
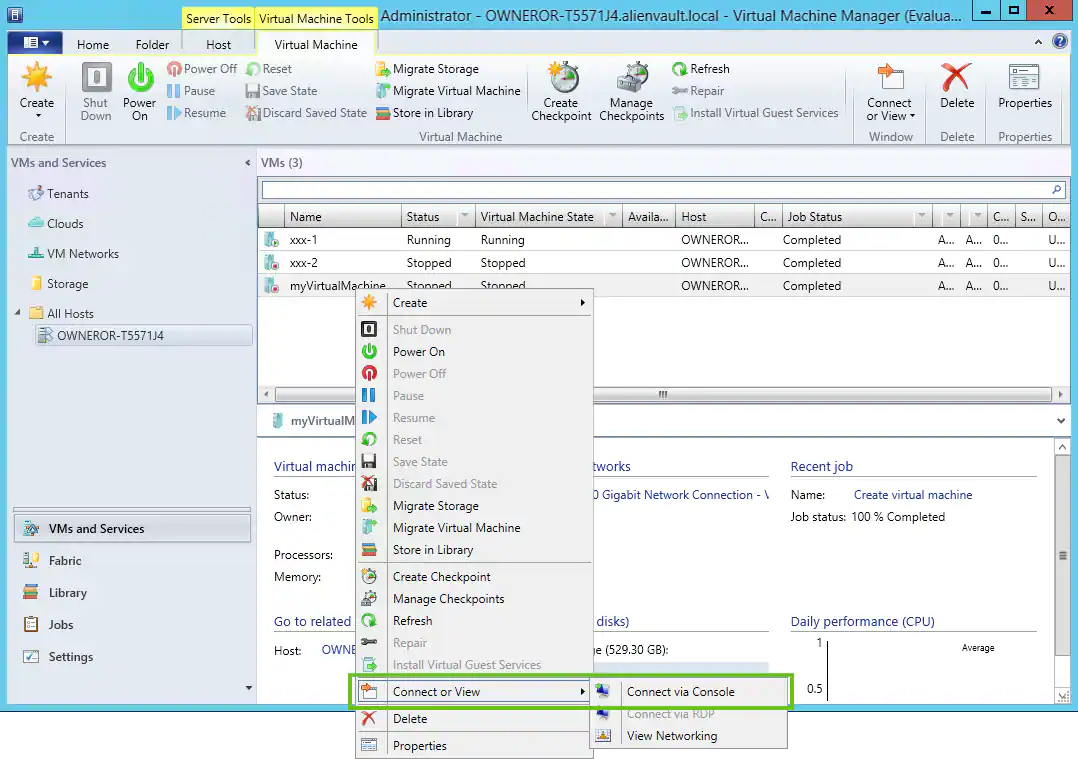
- Right-click the VM and select Power On. This process could take a few minutes. The Virtual Machine State will display as Running when this is complete.
-
Right-click the VM and select Connect or View > Connect via Console.
Use the information in the Welcome screen to log in to the sensor. This screen also displays the URL you can use to access USM Anywhere and register the sensor.
Create the VM with Hyper-V Manager
Follow these procedures to create and start the VM using Hyper-V Manager.Creating the VM
Creating the VM
To create a new VM with Hyper-V Manager
- Open the Hyper-V Manager and connect to the server.
- From the Actions panel, go to New > Virtual Machine. The New Virtual Machine Wizard launches.
- Click Next.
-
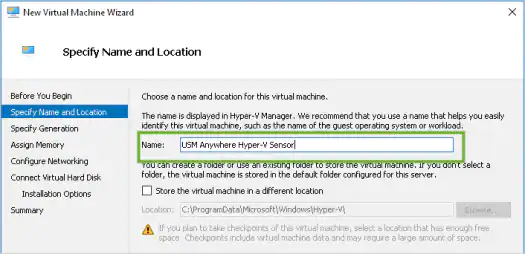
In Specify Name and Location, enter a name for the new VM, and then click Next.
- In Specify Generation, choose Generation 1 for the virtual machine, and then click Next.
-
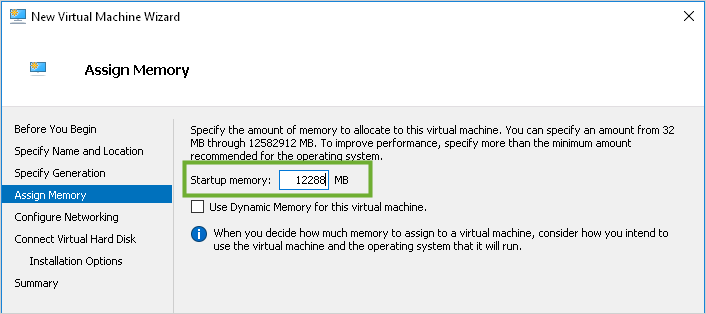
In Assign Memory, change the value of the Startup memory to 12288 MB.
Click Next when complete.
- In Configure Networking, connect the new VM to the desired network, and then click Next.
-
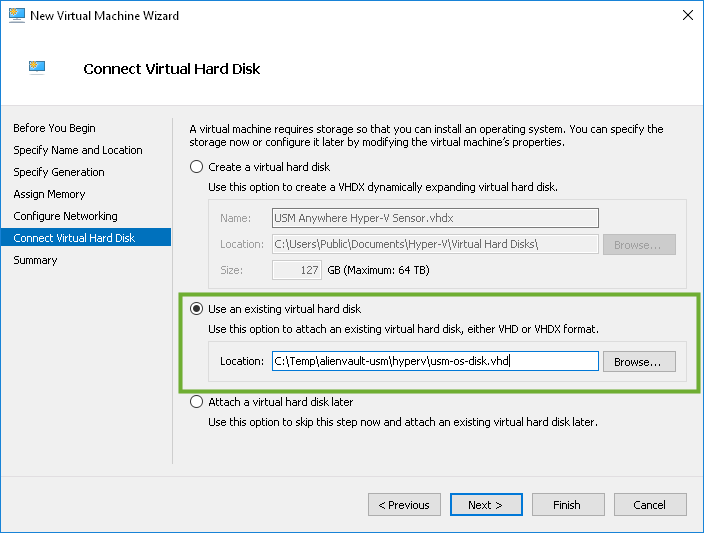
In Connect Virtual Hard Disk, select Use an existing virtual hard disk, and then click Browse to locate the usm-os-disk.vhd file that was extracted from the USM Anywhere Sensor package download.
Note: You will add the data disk later in another step because the wizard doesn’t support this.
- In Complete the New Virtual Machine Wizard, click Next and then Finish.
Configuring the VM
Configuring the VM
To configure a VM using the Hyper-V Manager
- Select the VM you previously created, and then select Action > Settings.
-
In the left navigation menu of the dialog box, select Processor, and then set the number of virtual processors to 4.
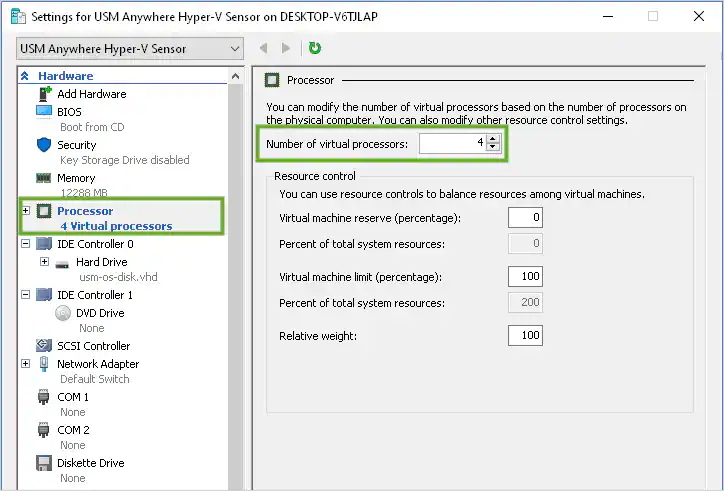
- Click Apply.
- In the left navigation menu, select IDE Controller 0.
-
Select Hard Drive, click Add, and then click Browse to locate the
usm-data-disk.vhdxfile that was part of the USM Anywhere Sensor download.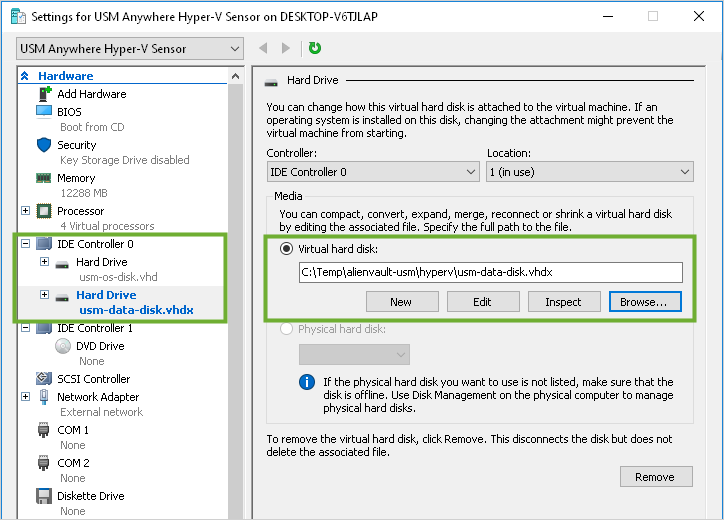
-
In the top-left corner of the dialog box, click Add Hardware, and then select Network Adapter > Add to add additional network adapters.
Repeat this function so that you have a total of five network adapters.
 Warning: The Hyper-V Sensor requires *all five network interface cards (NICs) *to be enabled; otherwise, the USM Anywhere update will fail. The NICs can remain disconnected.See Configure Network Interfaces for On-Premises Sensors for more information about these interfaces.
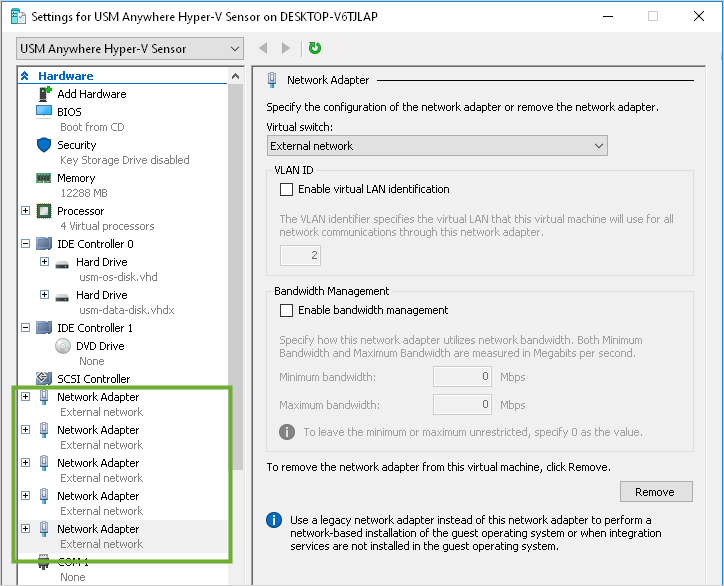
- Click OK.
-
Configure the ISO file for the datastore.
Warning: You must complete this step and ensure that the ISO is mounted before you start the sensor VM for the first time.If you see REPLACEME as the initial login password in the sensor welcome screen when you connect to the VM, it is most likely that the ISO was not mounted before the sensor was started. If this happens, you must shut down the VM, complete this step so that the ISO is configured for the datastore, and then begin the deployment process anew.
- Select IDE Controller 1 > DVD Drive.
- Select Image file, and then click Browse to locate the deploy_config.iso image file that was extracted from the USM Anywhere Sensor package download.
- Click Apply.
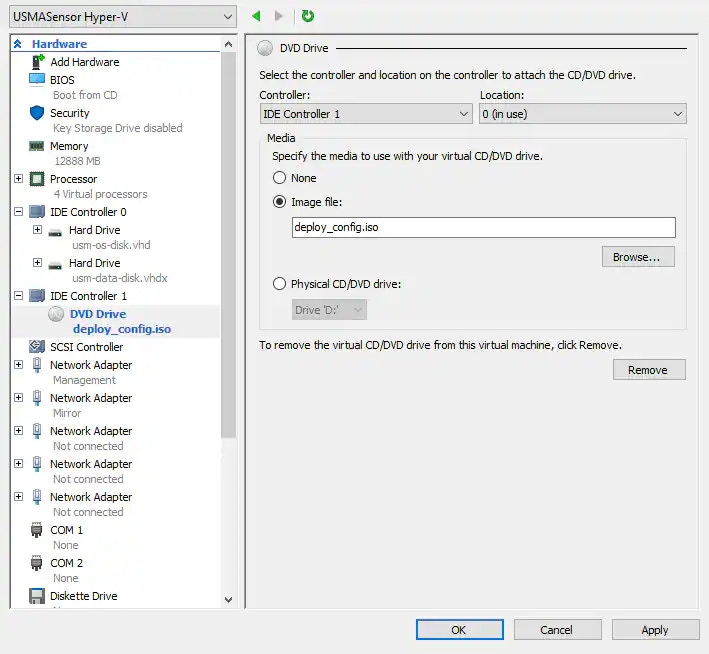
- Click OK and close the dialog box.
Starting the VM
Starting the VM
To start the VM and connect
- Select the VM and select Action > Start. This process can take a few minutes. The status displays as Running when this is complete.
- Select your VM and select Action > Connect. Use the information in the Welcome screen to log in to the sensor. This screen also displays the URL you can use to access USM Anywhere and register the sensor.