- From the Events List view, click the
 icon to open the Columns Configuration dialog box.
 - Enter raw in the search field of the available columns.
- Use the
 icon to pass the Raw Log column from one side to the other.
 - Click Apply.
Note: If you want to keep your configuration, you need to save it by selecting Save View > Save as. Otherwise, your custom view will not be kept when you move to another page.
- Go to Activity > Events.
- Search or use filters to limit the events if needed.
- In the upper right corner of the page, click Generate Report to open the Create Report dialog box.
-
Click the Download Raw Logs tab.
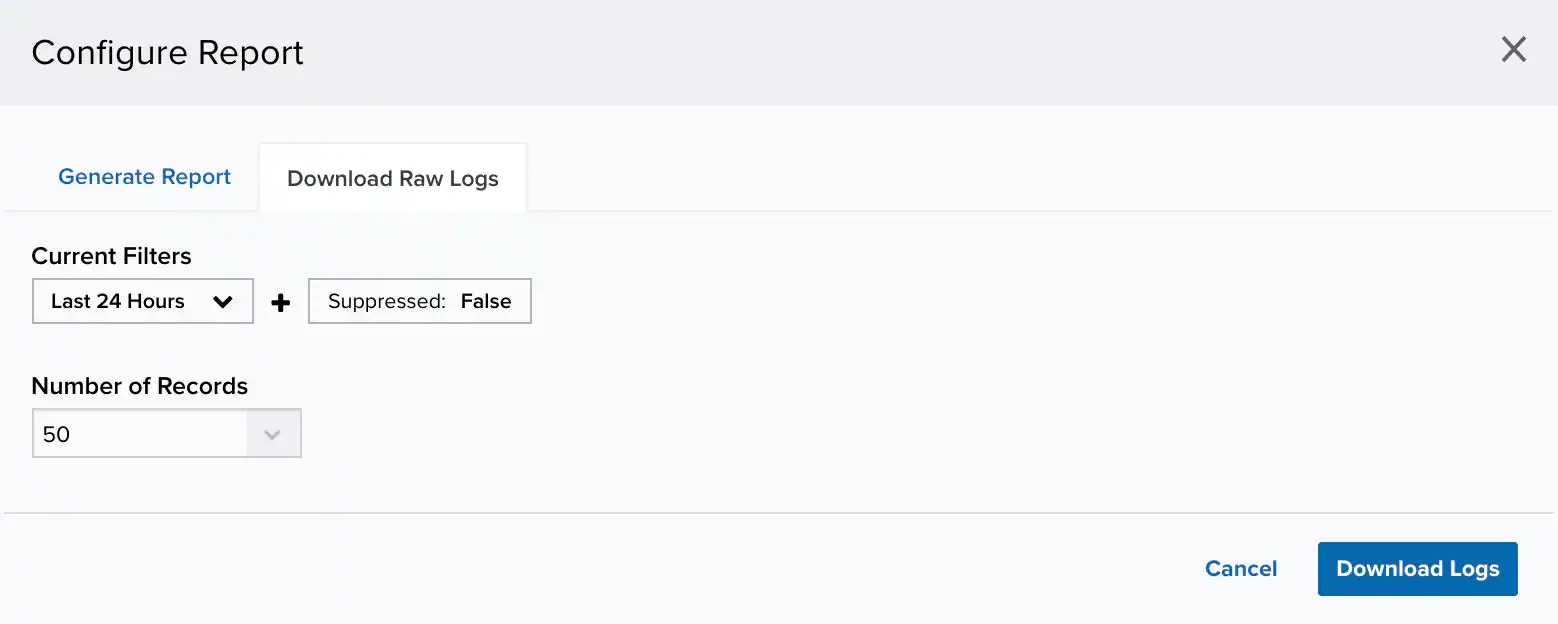
- Choose a date range. You can select a predefined range between Last Hour, Last 24 Hours, Last 7 Days, Last 30 Days, or Last 90 Days or Custom Range to set a particular date range.
- Under the Number of records section, choose the maximum number of records to include on the report: 20, 50, 100, 500, 1000, or 2500.
- Click Download Logs.