Note: If you don’t find a template for the application you need there, you can request one by following the instructions here.
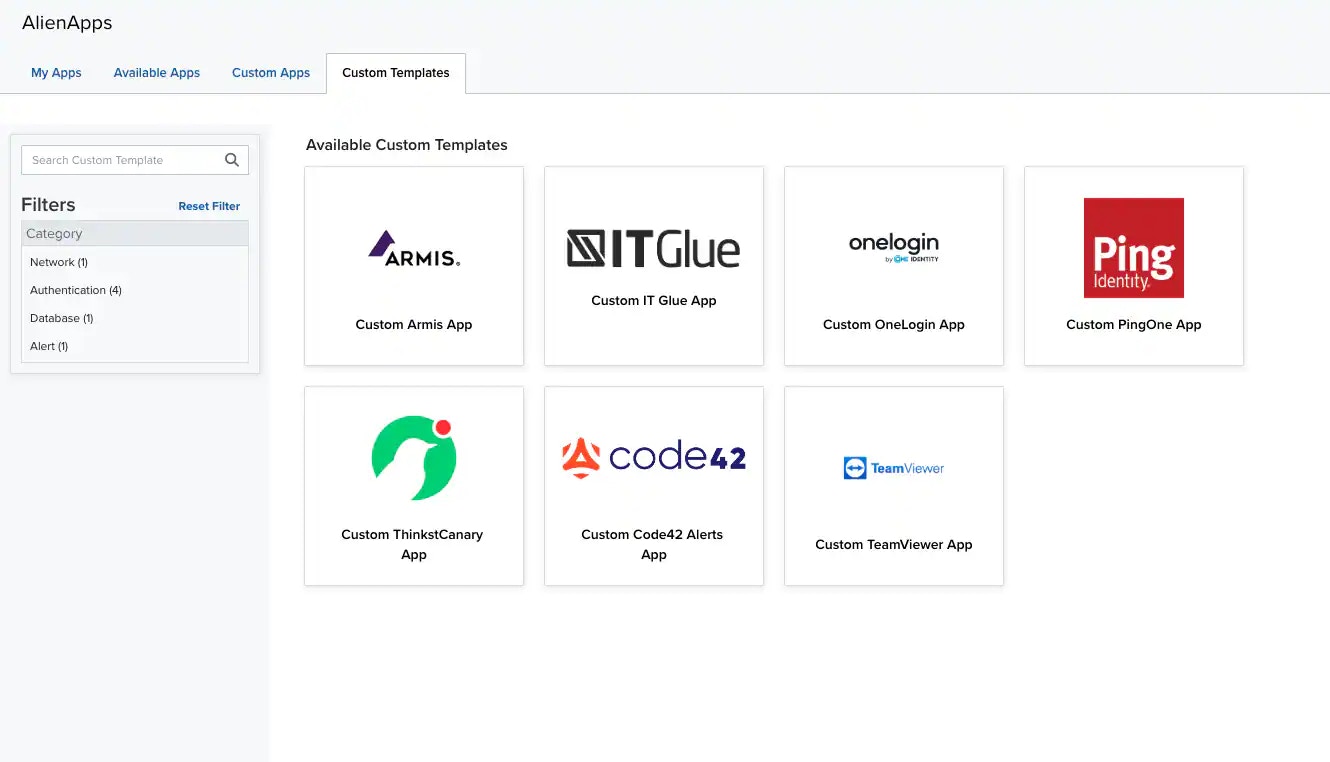
- Go to Data Sources > BlueApps > Custom Templates.
-
Select the template you want to use from the list of available templates.
-
On the first page, give your BlueApp a name and some identifying information.
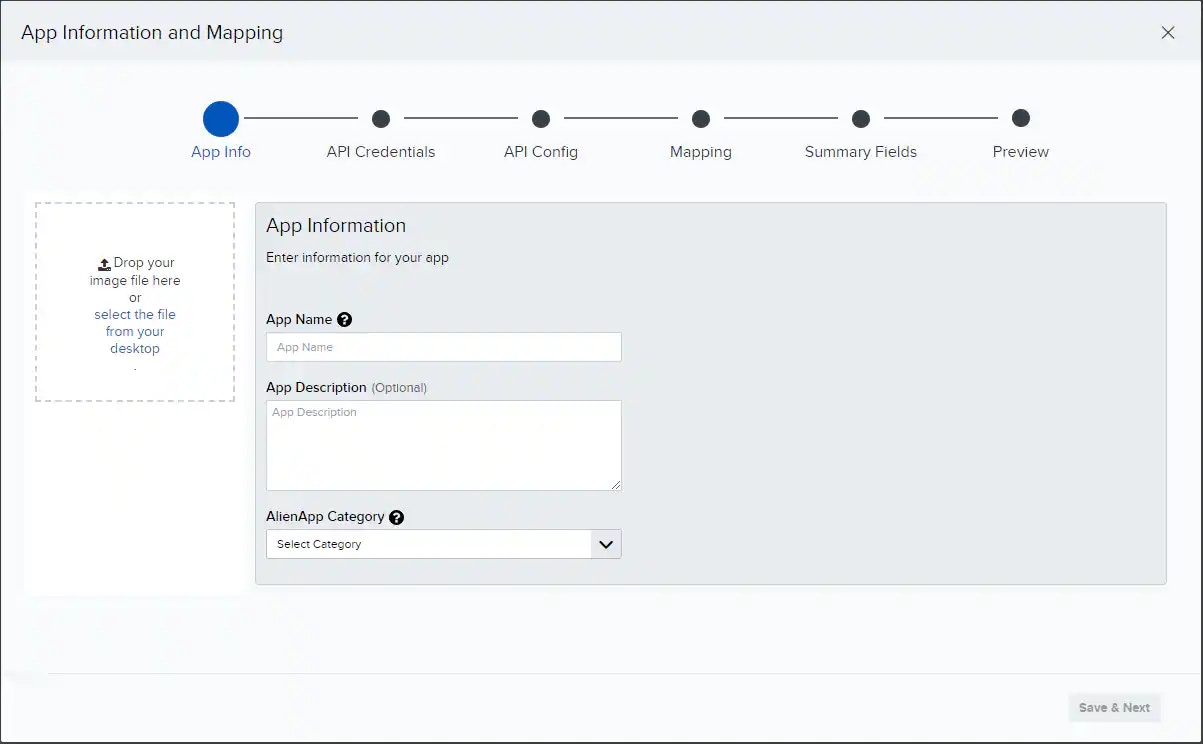
- App Name: Provide a unique name for your BlueApp.
- (Optional) App Description: Describe the new BlueApp’s intent or functionality.
- Category: Tag your app with a category, which will help you organize your BlueApps. You can filter BlueApps by category in the Custom App main page.
- (Optional) Logo: You may import a logo for this BlueApp. The template may include a logo already. If so, you can keep the preconfigured logo or change it per your custom app requirements.
- The template you chose comes preconfigured to use the correct type of authentication your third-party application requires. You must provide the credentials your BlueApp will use to connect to the third-party application. When you have finished entering your credentials, confirm them by clicking Test Connection. Click Next to continue.
- The custom template already contains most of the API configuration your custom BlueApp will need to communicate with your third party. Check the template specifications to see whether there is any additional configuration information you must to enter manually to prepare your advanced BlueApp to sync with your third-party application. Click Next to continue.
-
USM Anywhere uses the configuration details from the previous two steps to connect with your third party and extract data fields found in the logs they send. In addition, the custom template is configured with many of the mappings you will need between the third-party application’s data fields and fields in USM Anywhere.
Review the mappings populated by the template. If necessary, you can adjust or further configure the mapping details by dragging and dropping from the detected fields to their matching fields in USM Anywhere.
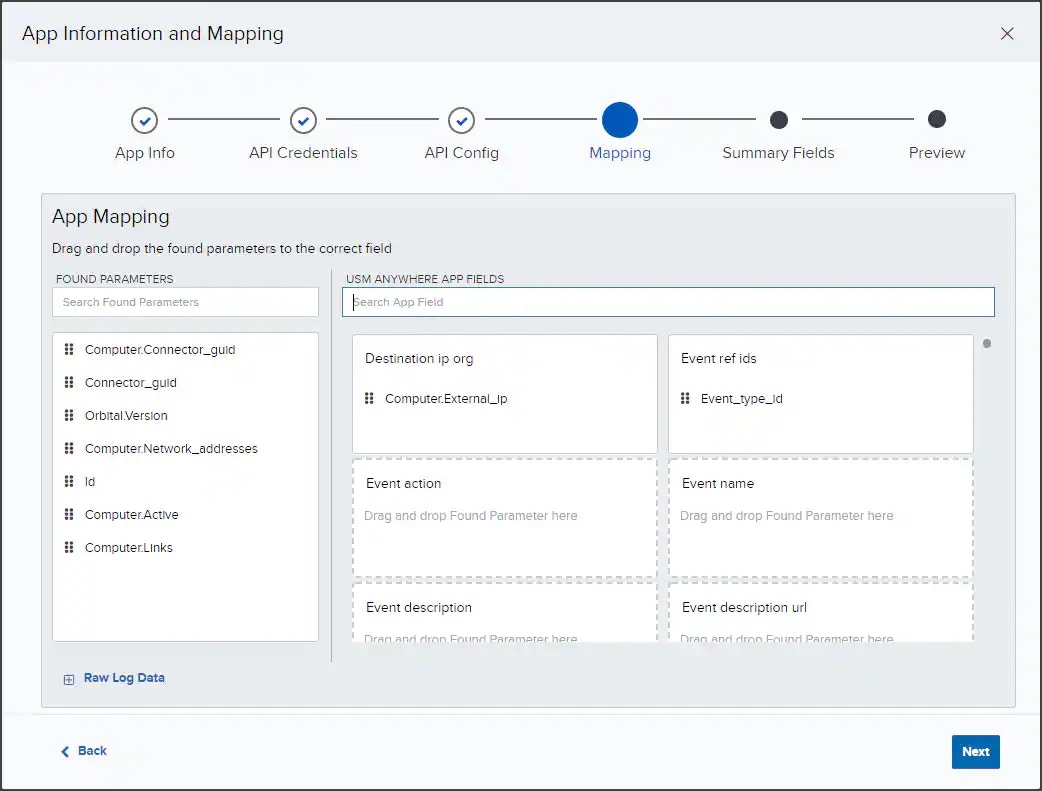
- Found Parameters: Fields on the left are extracted from logs fetched from your third-party application.
- USM Anywhere App Fields: Fields on the right are the standard USM Anywhere data labels.
See Event Keys for detailed definitions of the standard USM Anywhere data fields to help you match the extracted fields with those from USM Anywhere. Click Next to continue.Note: You can map multiple found parameters to the same USM Anywhere app field. -
Select which log fields to include in the Event Details for events your new advanced BlueApp will generate.
Click Save & Next to continue.
-
Use the Preview screen to review your custom advanced BlueApp’s configuration.
You can use the Back button to navigate to any previous page and make changes.
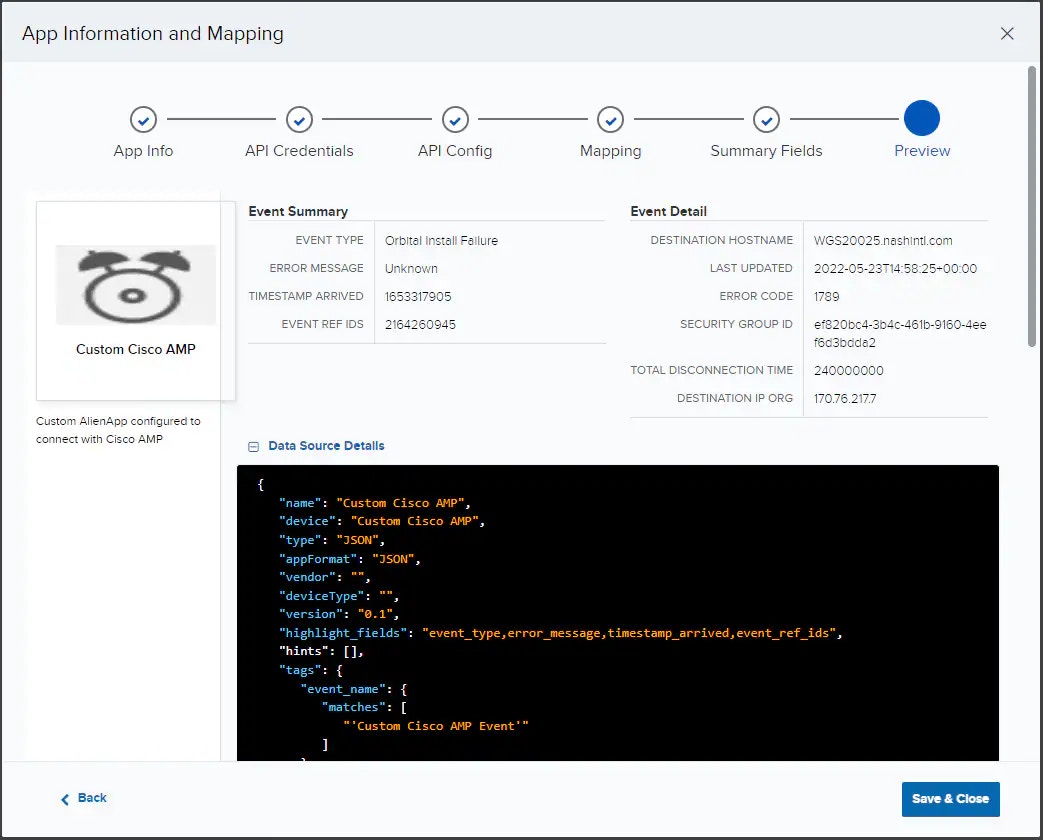
- Once you have finished all of the configuration steps for your custom advanced BlueApp, click Save & Close to create it. It will now be available to you under the My Apps tab of USM Anywhere.
