Note: The number of sensors that you can add to your environment depends on your USM Anywhere license. You can go to Settings > My Subscription to view the number of licensed sensors. See Subscription Management for more information.
- In USM Anywhere, go to Data Sources > Sensors.
-
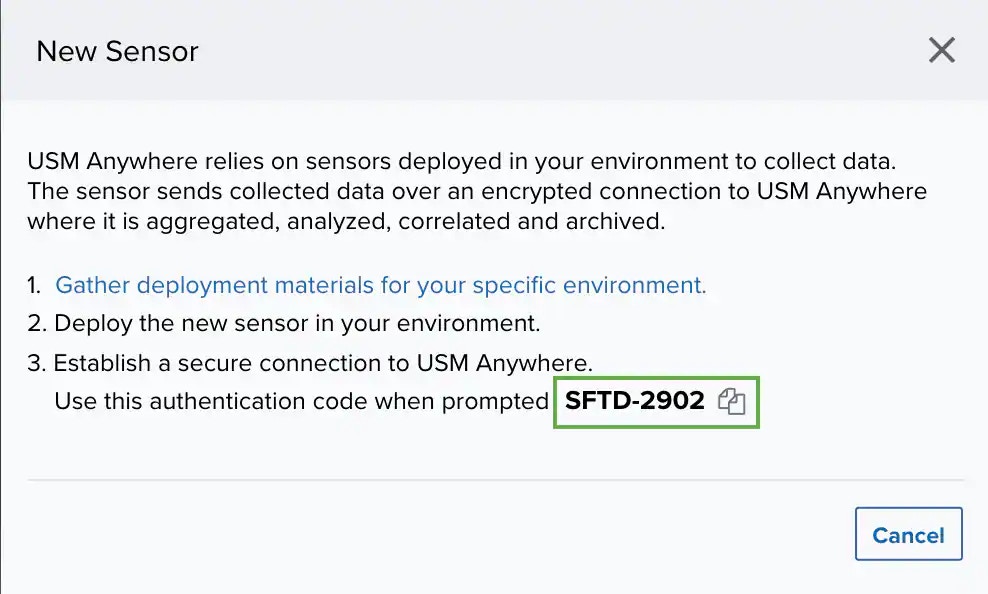
Click New Sensor.
The dialog box displays an authentication code for the new sensor.
-
Click the
 icon to copy the code to your clipboard.
You should paste this code to another location for use later and keep USM Anywhere open in the background.
icon to copy the code to your clipboard.
You should paste this code to another location for use later and keep USM Anywhere open in the background.
- Create the sensor virtual machine (VM) in your Azure subscription, as described in Deploy the USM Anywhere Sensor from the Azure Marketplace.
- Use the URL or public IP address to access the USM Anywhere sensor registration, as described in Connect the Azure Sensor to USM Anywhere.
-
When you get to the Welcome to USM Anywhere Sensor Setup! page, it prompts you to provide the information for registering the additional sensor with your USM Anywhere instance:
- Enter a Sensor Name and Sensor Description.
-
Paste the sensor authentication code you copied into the field with the
 icon.
icon.
-
Copy the URL of your existing USM Anywhere instance and paste it into the field with the Computer (
 ).
For example, if the subdomain with which you registered with LevelBlue was “mycompany,” the URL would be
).
For example, if the subdomain with which you registered with LevelBlue was “mycompany,” the URL would be mycompany.alienvault.cloudormycompany.gov.alienvault.us(for LevelBlue TDR for Gov).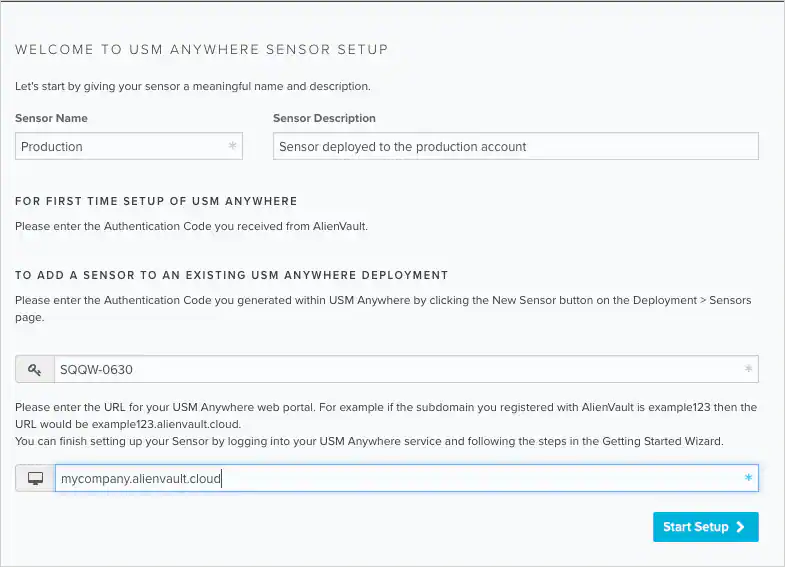
-
Click Start Setup.
A progress dialog box displays a status message.
Connecting USM Anywhere SensorWhen the connection is complete, a Welcome page opens.
-
Click the link to open the USM Anywhere web UI.
Upon login, this displays the USM Anywhere Sensor Configuration page with the connected sensor listed in the page.
 Note: Although you can wait to configure the new sensor at a more convenient time, LevelBlue strongly recommends that you do so now.