Note: Azure limits the availability of the Azure Marketplace to customers according to country. On the Marketplace FAQs page, the “Azure Marketplace for Customers” section provides a current list of supported countries.
-
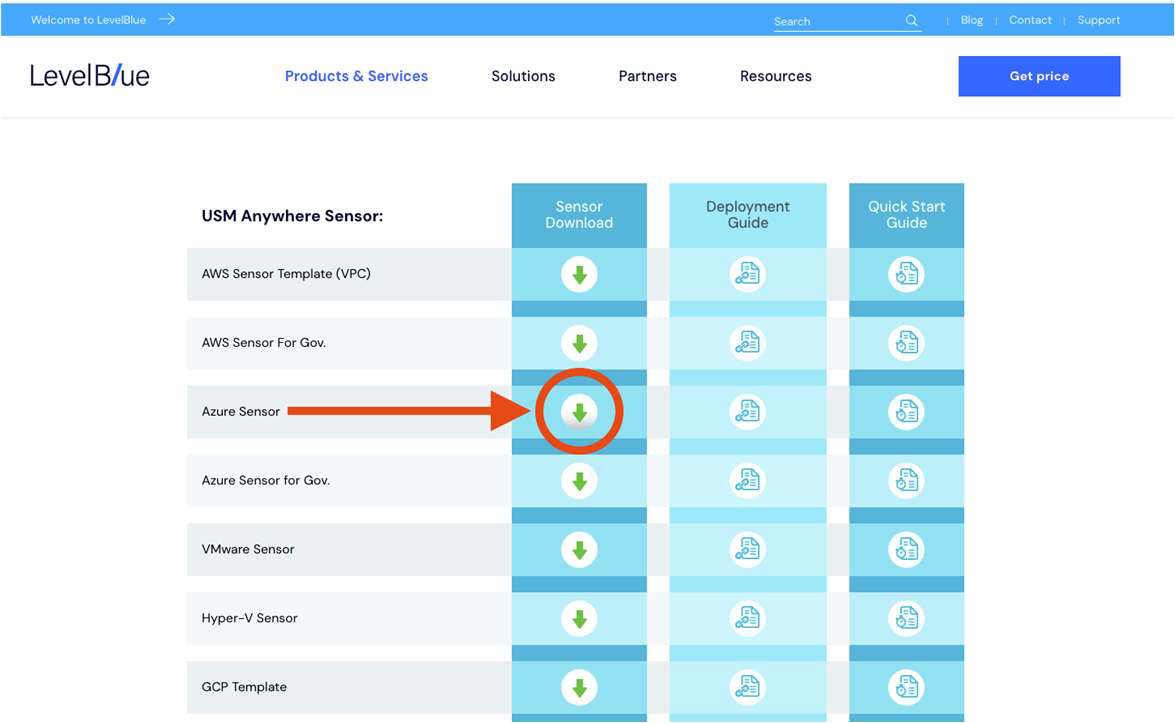
Go to the USM Anywhere Sensor Downloads page and select the download link of the Azure Sensor.
-
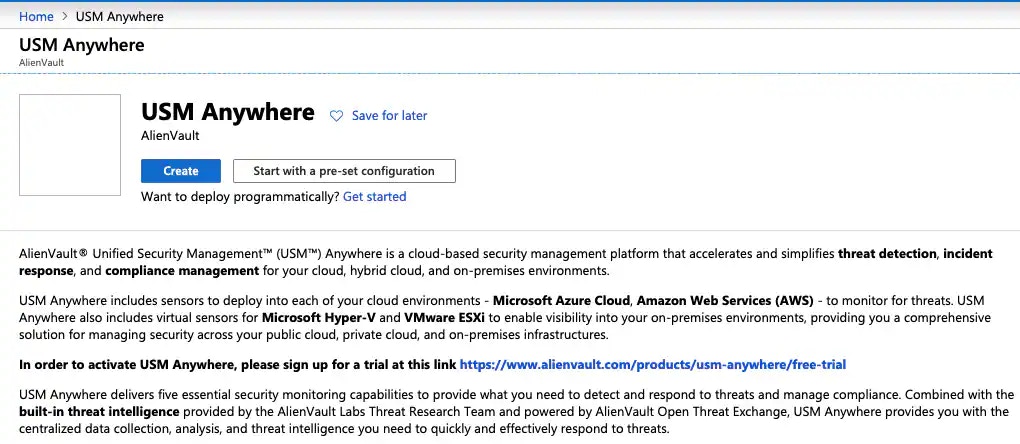
On the page, review the details of the license and click Create.
This takes you to the Create a virtual machine page, which guides you through the steps for deploying the USM Anywhere Sensor VM.
-
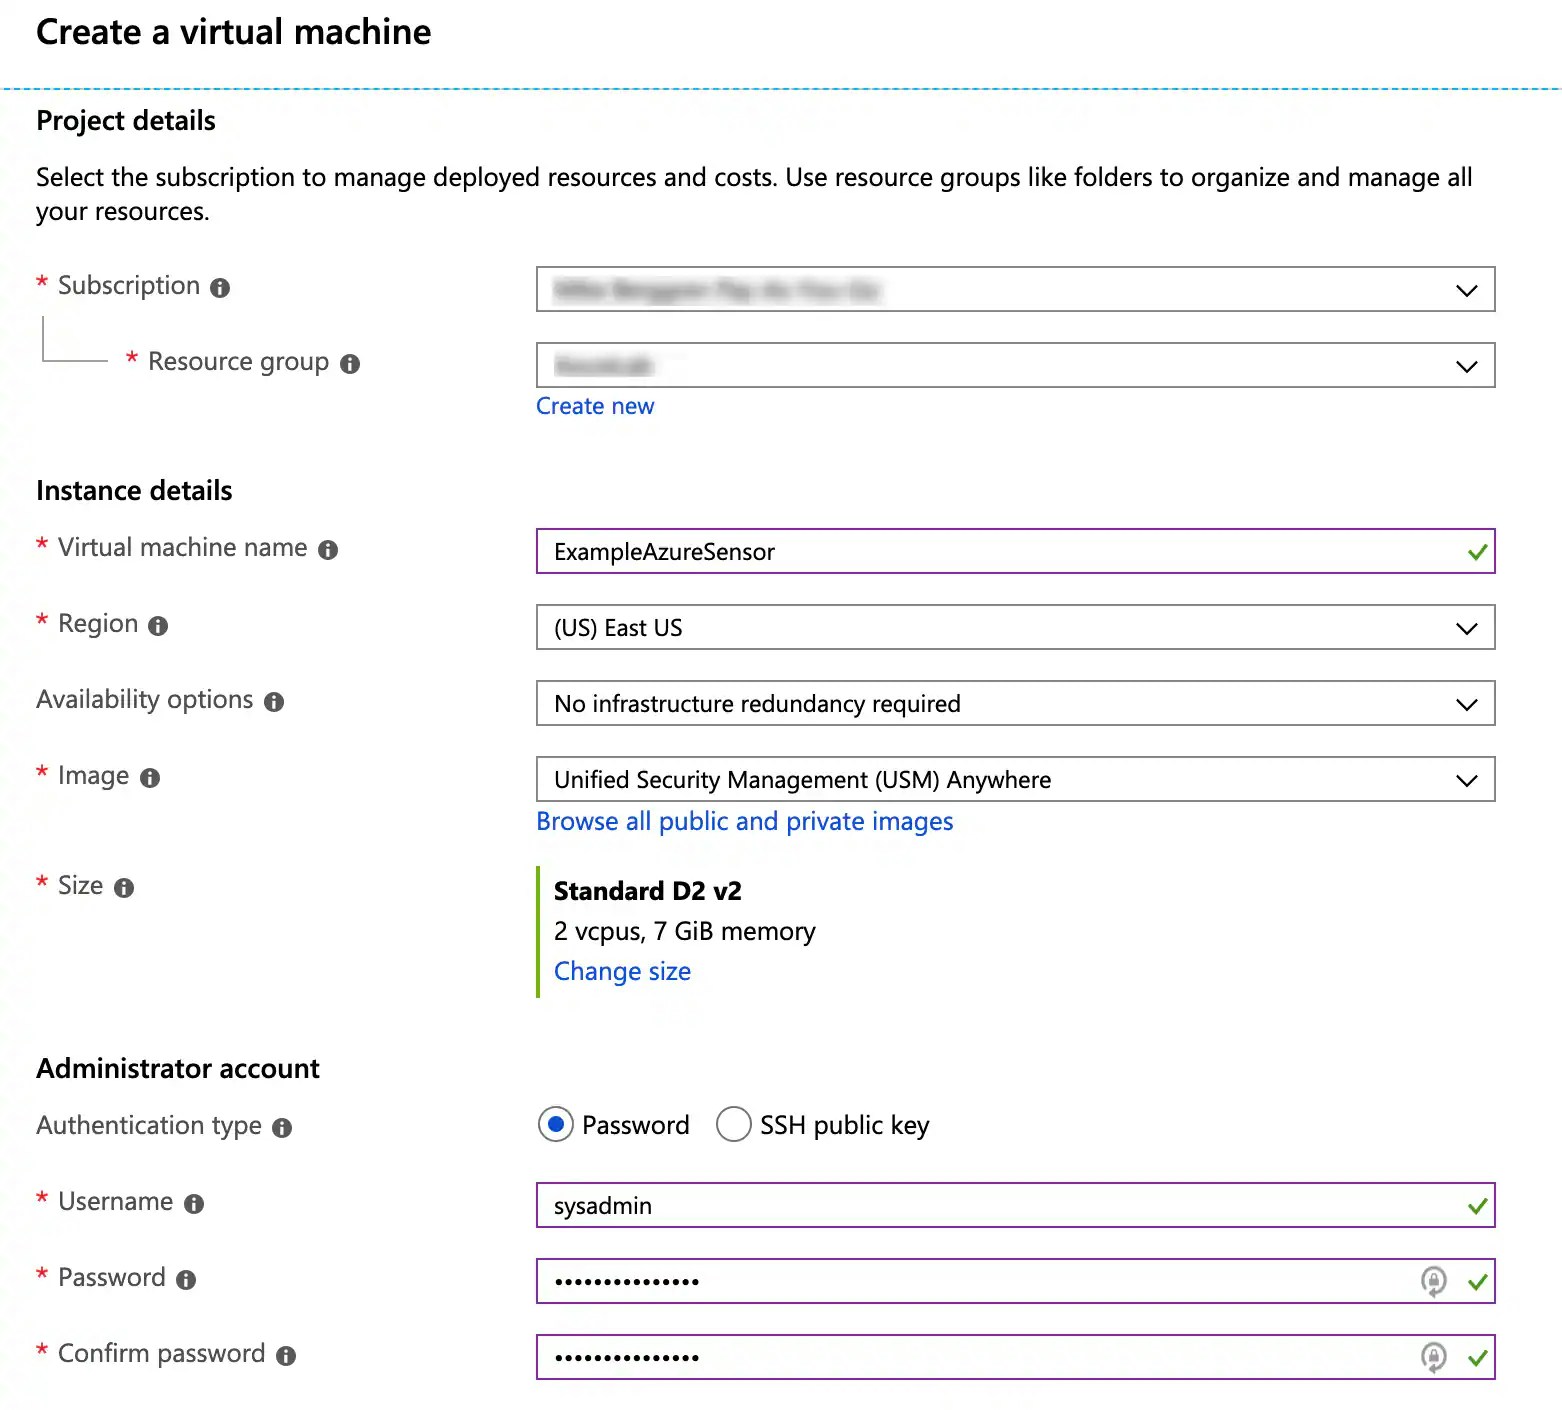
On the Basics tab, specify the required fields for the VM:
- Subscription: Select the subscription into which the USM Anywhere Sensor should be installed.
- Resource Group: Indicate whether you want to install the USM Anywhere Sensor into an existing resource group or into a new resource group. If new, enter a unique name.
- Virtual machine name: Enter the name you want to use for the USM Anywhere Sensor VM.
- Region: Select the region you want to deploy the USM Anywhere Sensor VM.
- Image: This field is set to Unified Security Management (USM) Anywhere.
- Size: This field is set to Azure Standard D2 v2.
- Authentication type: Set this option to specify an SSH public key or a password for SSH access.
- Username: Enter a username.
- Click Next : Disks.
- On the Disks tab, select Standard SSD as the disk type.
- Click Next : Networking.
- On the Networking tab, select the virtual network or subnet upon which the USM Anywhere Sensor VM should be installed. Keep the other defaults.
- Click Review + create to keep the defaults on the remaining tabs.
- On the Review + create tab, review your specifications and the cost summary.
- Click Create. This starts the deployment of the USM Anywhere Sensor, which can take up to six minutes.
-
After deployment finishes, click Go to resource or go to the overview page of the VM and locate its public IP address.

- Paste the IP address into your browser to launch the USM Anywhere Sensor Setup page.