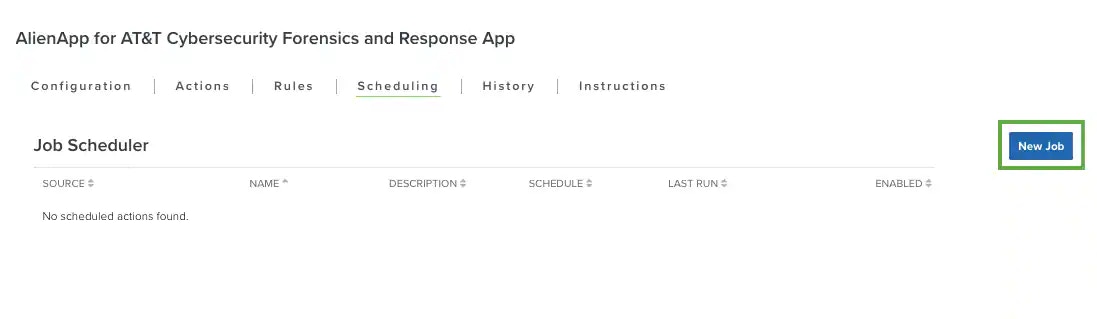
- In USM Anywhere, go to Data Sources > BlueApps.
- Click the Available Apps tab.
- Search for the BlueApp, and then click the tile.
- Click the Scheduling tab.
-
On the right side of the page, click New Job.
- Enter the name and description for the job. The description is optional, but it is a best practice to provide this information so that others can easily understand what it does.
- Select Sensor as the source for your new job.
-
Click the Action drop-down and select the command you want to run.
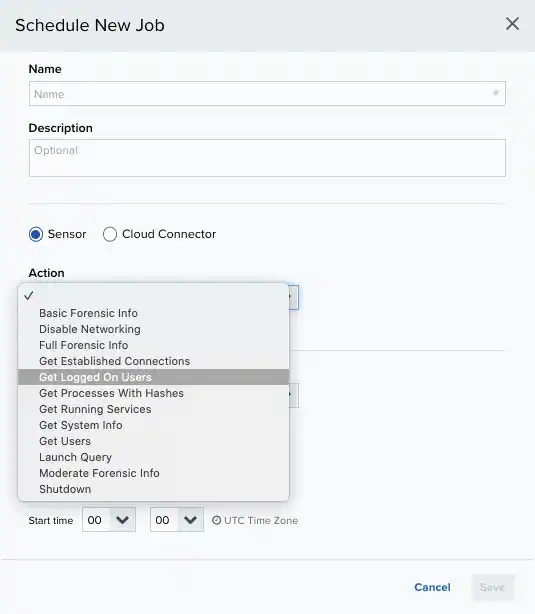
- Specify the asset that you want to use as a target for the action.
- (Optional) Set the required parameters. Some enforcement actions take one or more parameters in order to execute to system function on the target system. See Enforcement System Functions if you need more information about these parameters for a specific function.
-
In the Schedule section, specify when USM Anywhere runs the job:
a. Select the increment as Minute, Hour, Day, Week, Month, or Year.
b. Set the interval options for the increment. The selected increment determines the available options. For example, on a weekly increment, you can select the days of the week to run the job.Warning: After a frequency change, monitor the system to check its performance. For example, you can check the system load and CPU. See USM Anywhere System Monitor for more information.Or on a monthly increment, you can specify a date or a day of the week that occurs within the month.
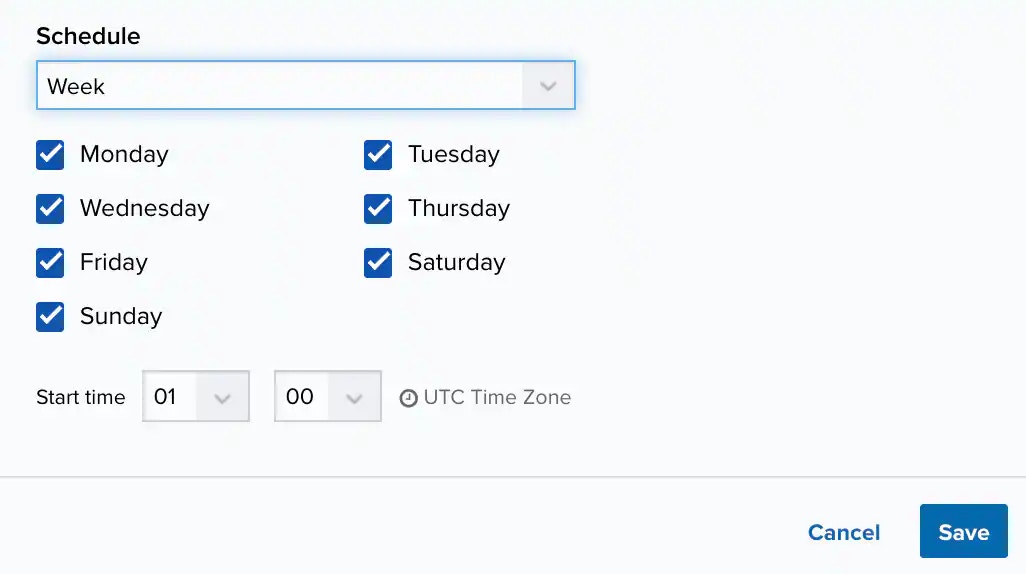 c. Set the start time. This is the time that the job starts at the specified interval. It uses the time zone configured for your USM Anywhere instance (the default is Coordinated Universal Time [UTC]).
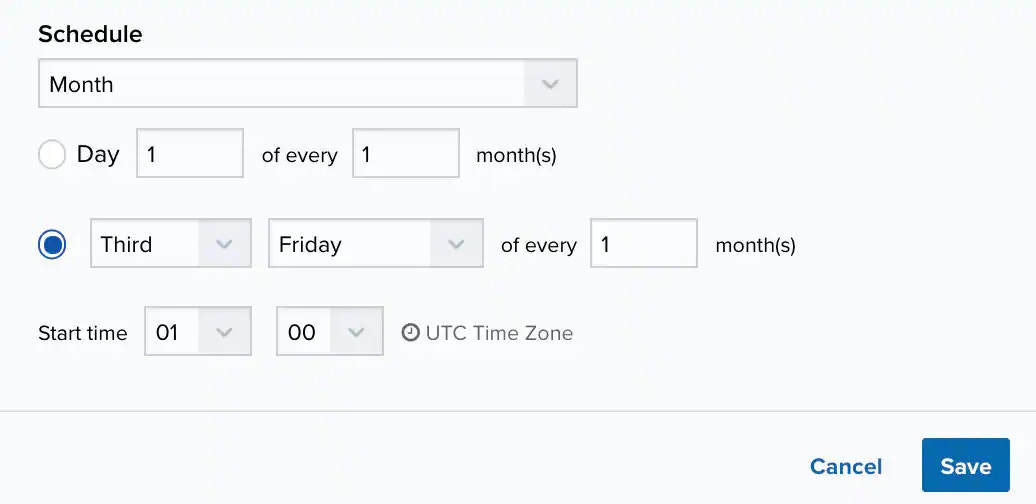
- Click Save.