**Note: **Filtering rules is not retroactive. The rule applies to future items, but not to to previous items, even if those items follow the rule.
- Go to Activity > Events.
- Search the events which you want to include in the filtering rule. See Searching Events for more information.
- Click one of them.
- Select Create Rule > Create Filtering Rule.
- Select a Boolean operator. The options are AND, OR, AND NOT, and OR NOT.
-
Select a packet type in the Match drop-down list.
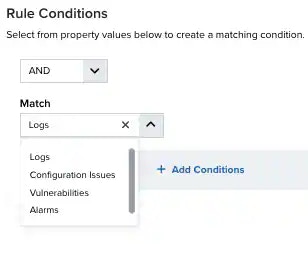
- Logs: Use this packet type for event-based rules.
- Configuration Issues: Use this packet type for configuration issues-based rules.
- Vulnerabilities: Use this packet type for vulnerabilities-based rules.
- Alarms: Use this packet type for console user alarms-based rules.
-
You have already suggested property values to create a matching condition. If you want to add new property values, click Add Condition.
**Note: **Less common parameters will appear as paired Custom Header N and Custom Field N rows with the parameter’s name and value. N represents the number that is automatically given to the parameter.Note: If the field is related to the name of a country, you should use the country code defined by the ISO 3166.Note: The Sources or Destinations field needs to match the universally unique identifier (UUID) of the event or alarm. You can use the Source Name or Destination Name field instead.Note: If you need to add a property value that maps with a property key, you need to know the mapping of the field. See Determining the Mapping of a Field for more information.
-
(Optional) Click Add Group to group your conditions.
Note: See Operators in the Orchestration Rules for more information.
-
In the Occurrences text box, enter the number of event occurrences that you want to produce a match on the conditional expression to trigger the rule.
You can enter the number of occurrences or use the arrows to scroll the value up or down. You can enter a number between 1 and 100.
Note: The current rule box shows you the syntax of your rule, and the rule verification box reviews that syntax before saving the rule.
-
Click Next.
- Enter a name for the rule.
- (Optional) Enter a description for identifying this rule.
- Click Save. The created rule displays in the list of rules. You can see it from Settings > Rules. See Orchestration Rules for more information.