| Role Availability | Read-Only | Investigator | Analyst | Manager |
- Go to Environment > Assets.
-
Next to the asset name that you want to include in an asset scan, click the
 icon and select Full Details.
-
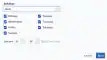
Select Actions > Schedule Scan Job.
The Schedule New Job dialog box opens.

- Enter the name and description for the job. The description is optional, but it is a best practice to provide this information so that others can easily understand what it does.
- In the Action Type field, select Asset Scanner. Depending on the USM Anywhere Sensor that you have installed, this field can include different options.
- Select a sensor in case you have more than one installed.
- In the App Action field, leave Scan, which is the default option. This option discovers services, operating systems (OSes), hostnames, IP and media access control (MAC) addresses, and vulnerabilities of known hosts.
- The Asset field displays the name of the asset to scan. You can’t modify this field.
-
Select the scan profile that you want to run:
- Discovery: This profile scans the known ports and services searching for the most-used ports. (There are 4571 ports.)
- Complete: This profile scans all TCP and UDP ports to find the possible ports in a deployment. (There are 65535 ports.)
- Vulnerability Discovery: Performs general network discovery and checks for specific known vulnerabilities. It only reports results if they are found.
- Extended Vulnerability Discovery: Performs a Vulnerability Discovery scan, which actively discovers more about the network.
- Intensive Vulnerability Discovery: Performs several tasks to discover vulnerabilities, which uses a significant number of resources on the targeted machine. Because of this, sensitive targets may perceive a brief disruption on their services.
-
Select Set Debug Mode if you want to log the results of the scan or if you have a problem with a scan.
This option is disabled by default.
Note: The Set Debug Mode option must be used only for debugging purposes because it needs a large amount of disk space for the file or files that it generates. Only LevelBlue Technical Support should review these files. You can contact this department for more information.
-
In the Schedule section, specify when USM Anywhere runs the job:
a. Select the increment as Minute, Hour, Day, Week, Month, or Year.
b. Set the interval options for the increment.
The selected increment determines the available options. For example, on a weekly increment, you can select the days of the week to run the job.
Or on a monthly increment, you can specify a date or a day of the week that occurs within the month.
 c. Set the start time. This is the time that the job starts at the specified interval. It uses the time zone configured for your USM Anywhere instance (the default is Coordinated Universal Time [UTC]).Important: USM Anywhere restarts the schedule on the first day of the month if the option “Every x days” is selected.
 - Click Save. The job now displays in the job scheduler list.
Note: See USM Anywhere Scheduler for more information.