| Role Availability | Read-Only | Investigator | Analyst | Manager |
- Go to Environment > Assets.
- Next to the asset name that you want to include in an asset scan, click the icon and select Full Details.
- Select Actions > Schedule Scan Job.
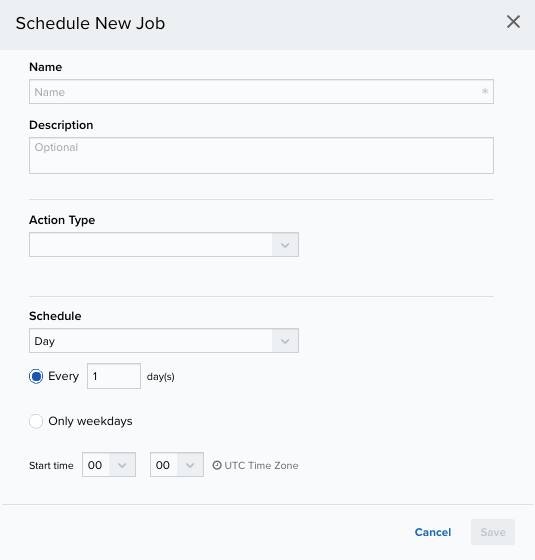
- Enter the name and description for the job.
- In the Action Type field, select Authenticated Asset Scanner. Depending on the USM Anywhere Sensor that you have installed, this field can include different options.
- Select a sensor in case you have more than one installed.
- In the App Action field, Scan is the default option. This option discovers services, operating systems, hostnames, IP and MAC addresses, and vulnerabilities of known hosts.
- The Asset field displays the name of the asset to scan. You can’t modify this field.
-
In the Schedule section, specify when USM Anywhere runs the job:
a. Select the increment as Minute, Hour, Day, Week, Month, or Year.
b. Set the interval options for the increment.
The selected increment determines the available options. For example, on a weekly increment, you can select the days of the week to run the job.
Or on a monthly increment, you can specify a date or a day of the week that occurs within the month.
 c. Set the start time. This is the time that the job starts at the specified interval. It uses the time zone configured for your USM Anywhere instance (the default is Coordinated Universal Time [UTC]).
- Click Save.
Note: See USM Anywhere
Scheduler for
more information.