| Role Availability | Read-Only | Investigator | Analyst | Manager |
| Column Field Name | Description |
|---|---|
| Asset Name | Name of the asset. |
| Agent Type | Platform of the agent. This column displays when you open the Asset List View page from the Agents page. |
| Agent Version | Version of the agent. This column displays when you open the Asset List View page from the Agents page. |
| FQDN | Fully qualified domain name. |
| IP Addresses | IP address for the asset. |
| Sensor | USM Anywhere name associated with the asset. The type of sensor is also displayed below the sensor name. |
| Jobs | Number of scheduled jobs. This column is not displayed when you open the Asset List View page from the Agents page. |
| Asset Type | Device type that identifies the asset. Select an option from the list (see USM Accepted Asset Types for more info). |
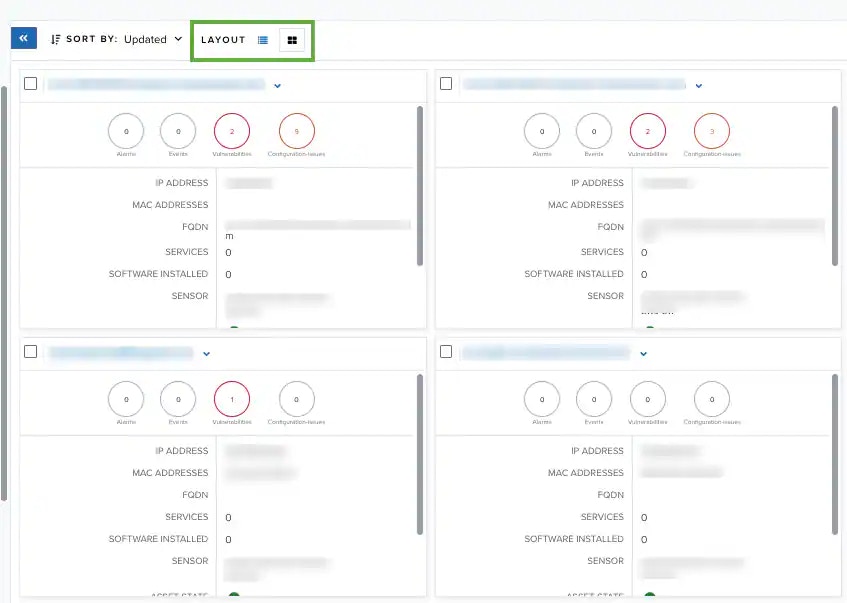
| Alarm Counter | Number of detected on the asset. |
| Event Counter | Number of events related to the asset. |
| Vulnerabilities Counter | Number of vulnerabilities detected on the asset. |
| Config Issues | Number of configuration issues related to the asset. Only available for Amazon Web Services () and Microsoft sensors. |
| Updated | Date on which the asset was updated. The displayed date depends on your computer’s time zone. |
Important: The alarm and event counts are not updated in real time, but are calculated every hour. If the counts are not updated, it can happen because new events or alarms are in your environment after the last count.
Important: The vulnerability and configuration issues counts are updated after every scan.
Note: You can view your bookmarked items by going to the secondary menu and clicking the  icon. This will display all of your bookmarked items and provide direct links to each of them.
- Find in Events: Use this option to execute a search of the asset name in the Events page. See Searching Events for more information.
- Look up in OTX: This option searches the IP address of the asset in the OTX page. See Using OTX in USM Anywhere for more information.
- Full Details: See Viewing Assets Details for more information.
- Configure Asset: See Editing Assets for more information.
- Delete Asset: See Deleting the Assets for more information.
- Assign Credentials: See Managing Credentials in USM Anywhere for more information.
- : This option displays depending on the USM Anywhere Sensor associated with the asset. See Running Authenticated Asset Scans for more information.
- Scan with BlueApp: This option enables you to run an asset scan through an BlueApp. See Running Asset Scans Using a BlueApp for more information.
- Run Scan: This option displays depending on the USM Anywhere Sensor associated with the asset. See Running Asset Scans for more information.
- : This option opens the Assets Details page. The Configuration Issues tab is selected in the page. See Viewing Assets Details for more information.
- Vulnerabilities: This option opens the Assets Details page. The Vulnerabilities tab is selected in the page. See Viewing Assets Details for more information.
- Alarms: This option opens the Assets Details page. The Alarms tab is selected in the page. See Viewing Assets Details for more information.
- : This option opens the Assets Details page. The Events tab is selected in the page. See Viewing Assets Details for more information.
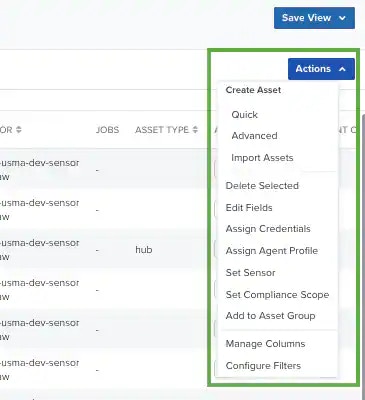
Important: You need to select one or more assets if you want to activate the options of the Actions button. Some options can be gray if there isn’t any asset selected. See Selecting Assets in Asset List View for more information.
- Quick: Use this option to add the asset name and either an IP address or FQDN, and then select a USM Anywhere Sensor. See Adding Assets in the UI for more information.
- Advanced: Use this option to add an asset. This method requires more data related to the asset that you are adding. See Adding Assets in the UI for more information.
- Import Assets: Use this option to add several assets through a CSV file. See Importing Assets from a CSV File for more information
- Delete selected: See Deleting the Assets for more information.
- Edit Fields: See To assign asset fields to an asset or group of assets for more information.
- Assign Credentials: See Managing Credentials in USM Anywhere for more information.
- Assign Agent Profile: See Assign LevelBlue Agent Configuration Profiles to Assets for more information. This option is available for users whose role is Manager.
- Set Sensor: See To assign a sensor to an asset or a set of assets for more information.
- Set Compliance Scope: See Working with Assets and PCI DSS for more information.
- Add to : See Creating an Asset Group for more information.
- Manage Columns: See Configuring Columns on Assets for more information.
- Configure Filters: See Managing Filters for more information.